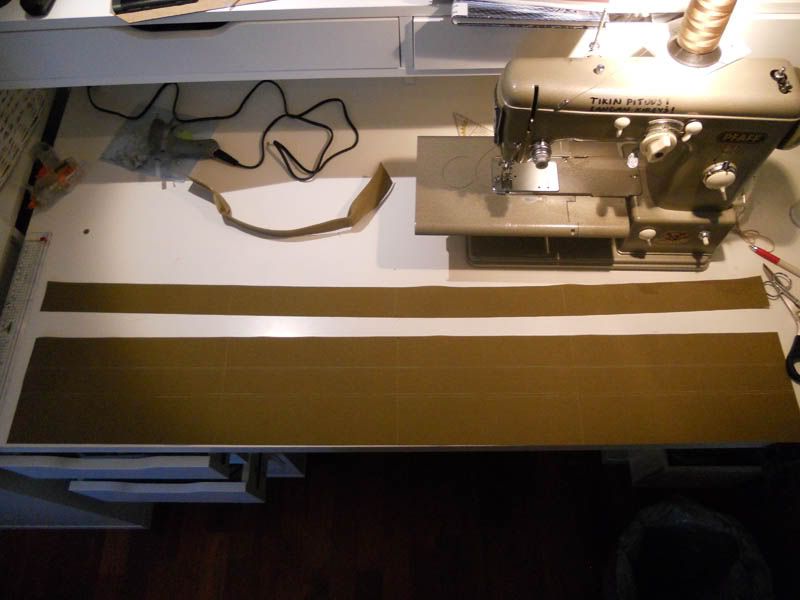
1.) I won´t go into details about measurements, etc.. I´m just showing you what kind of process it is to make a backpack. This is such a big project that making a “Don´t use your own brains, just follow these steps and you´ve got yourself a backpack”-tutorial would have taken ages
to make. Maybe this will encourage more people into making backpacks, especially the less experienced ones after they see that there really is no greater mystery behind packs;
to make. Maybe this will encourage more people into making backpacks, especially the less experienced ones after they see that there really is no greater mystery behind packs;
They are just like GP pouches, although bigger and they have shoulder straps.
2.) There are a lot of different pack designs. For this tutorial, I chose a simple, clamshell type backpack (pretty much like ATS RAID or Cobra.. (This actually looks a LOT like Cobra). If you have never made a backpack, I recommend you start from something simple like this.
3.) The techniques/methods i´ll show you, are not “the one and only way to do this or that”. This is just the way how I make backpacks.
4.) I have left out certain details/phases, like how to sew Pals, how to box-x, and stuff like that.. I assume that if someone is giving their first backpack project a go, they already know the basics of this craft.
5.) When i´m speaking about measurements, I use the metric system, so sorry about that, guys in US.
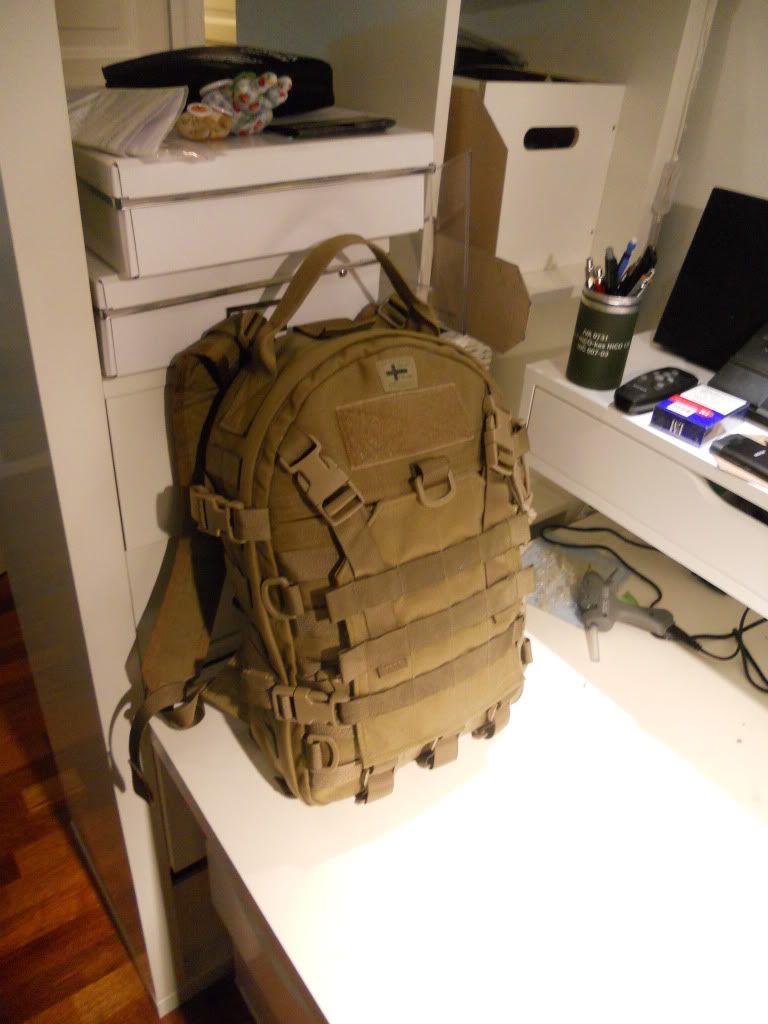
No one ordered this pack from me, nor did I even have any need for a pack like this, so I made it only for the tutorial. This is an E&E / Small day pack.
Let´s start.
A backpack consists from 4 parts;
Shoulder straps
Backpanel
The side/bottom piece
Front piece
Backpanel
The side/bottom piece
Front piece
And usually, that´s the order I start making a pack.
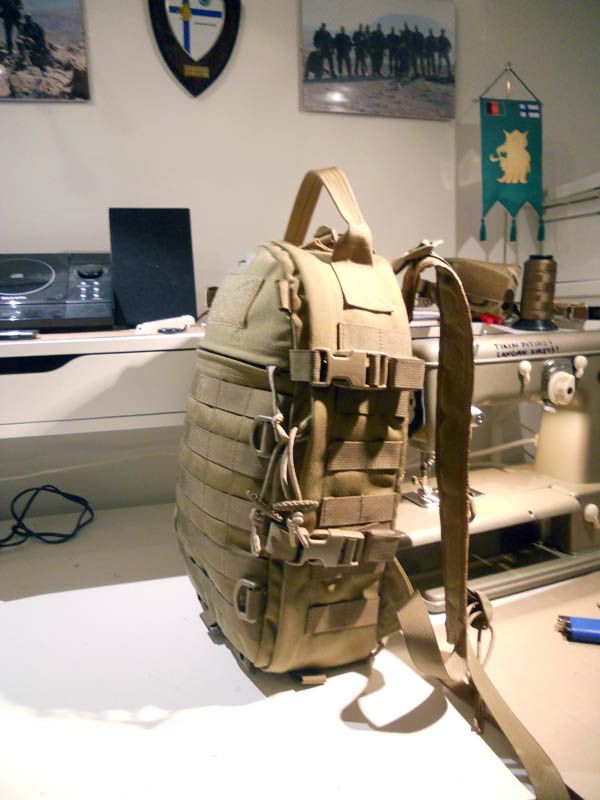
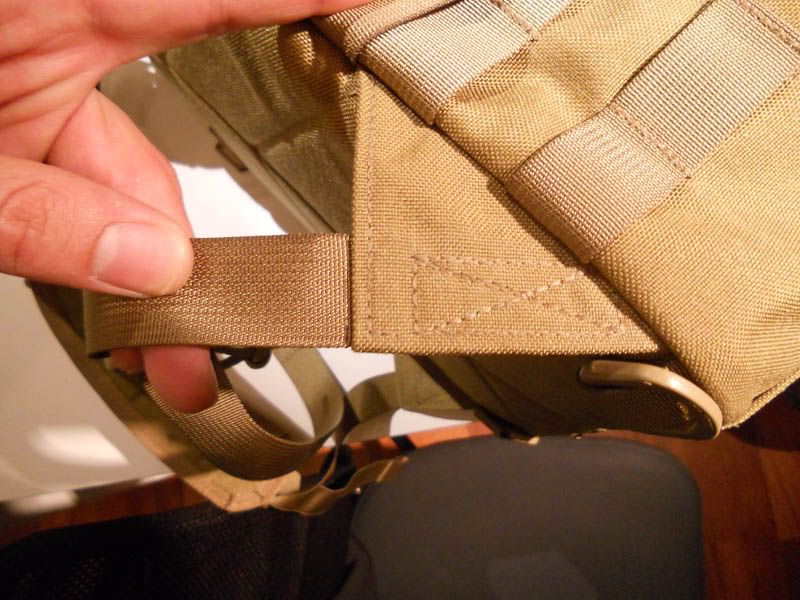
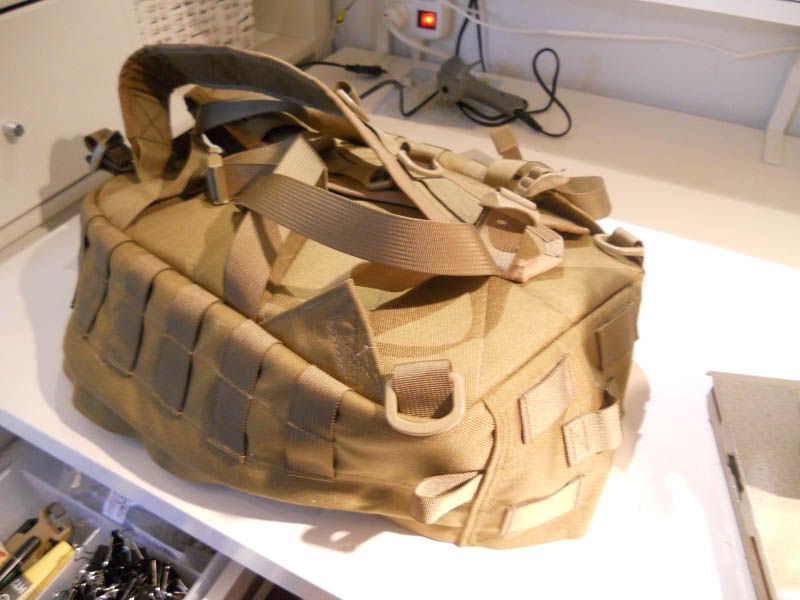
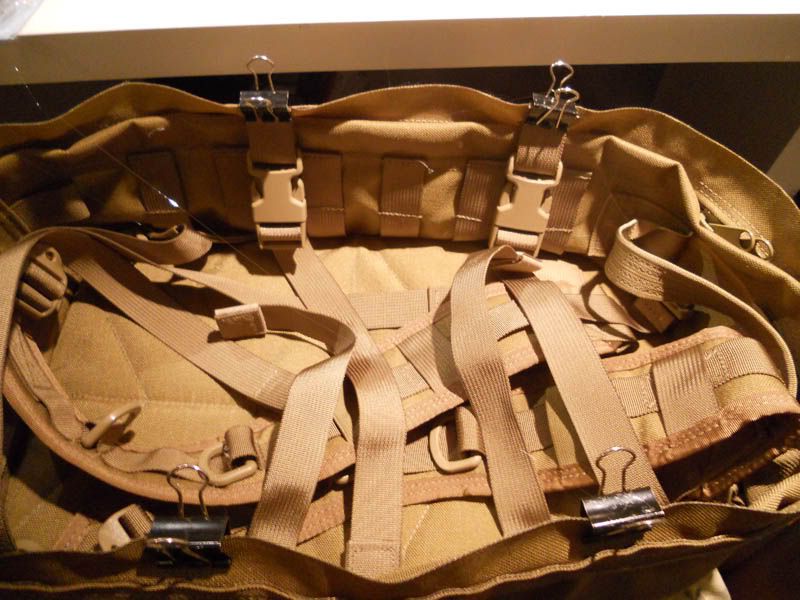
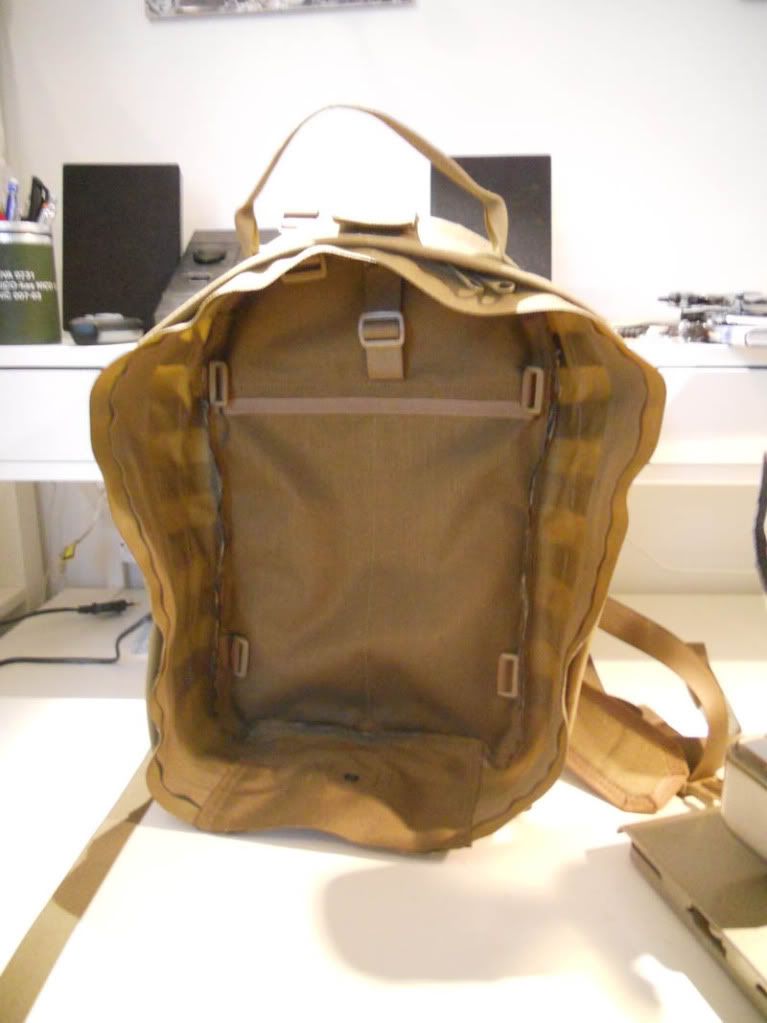
First; here´s how the end product should look like.
[IMG]


[IMG]
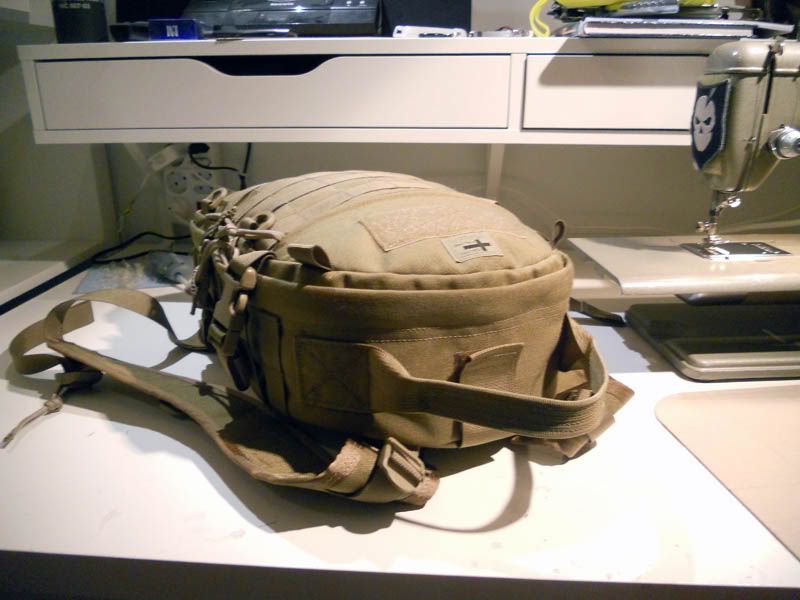
[IMG]
Let´s begin from shoulder straps.
There are a couple of ways to make these; The “inside out”-method, and the “sandwich the padding in between bottom and top layer of the shoulder straps and bind around it”-method, which I used with this pack. This method gives a pretty sharp looking result, but it requires you to have at least adequate binding skills. I know from a bitter experience that bad binding can ruin a perfectly good project.
I still suck at binding curves, and my binding attachment doesn´t seem to help me with that, hence the angles on both ends of the straps. Angled corners are a lot easier to bind than rounded corners (at least for me)
As this will be an E&E-type of pack, I didn´t use any spacer mesh/air mesh with it. Also, when I started making packs, I thought that the thicker the padding is, the more comfortable it is to carry. That´s not the case, of course. It´s more important to shape the shoulder straps correctly. Correctly shaped straps will divide the weight evenly, and they are also less bulky, which is especially important if you are carrying the pack while wearing body armor
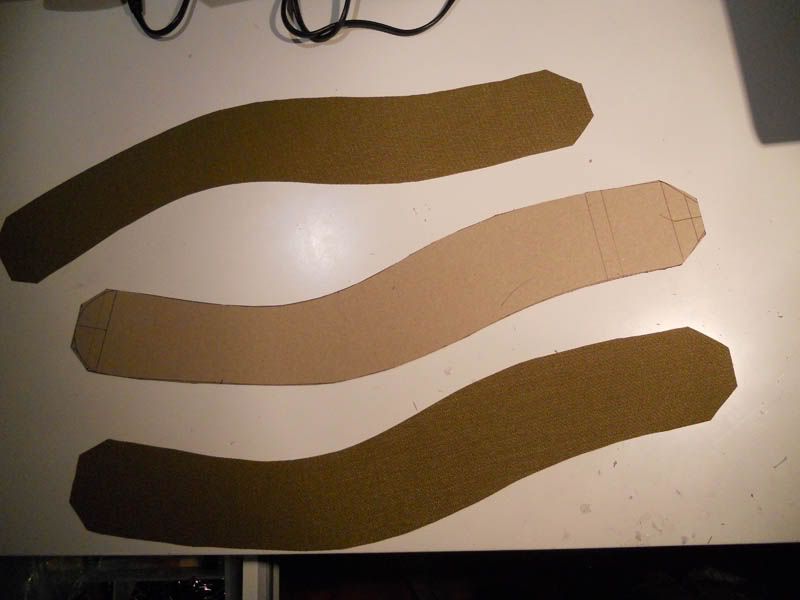
Start off from making a template for the straps. If you already have a pack which you find comfortable to carry, make the template using the shape of it´s straps as a reference.
Cut the top and bottom layers using the template.
[IMG]
Tack down the webbing using hot glue, and sew the webbing in place (remember to box-x it from the both ends)
[IMG]
Cut the padding using your template. I used 4mm thick closed cell foam. (Like I said, this will be a small pack, so that will do) Use spray on adhesive in attaching the top layer and the bottom layer into it (not a necessity, but it helps and I prefer it over hot glue)
[IMG]

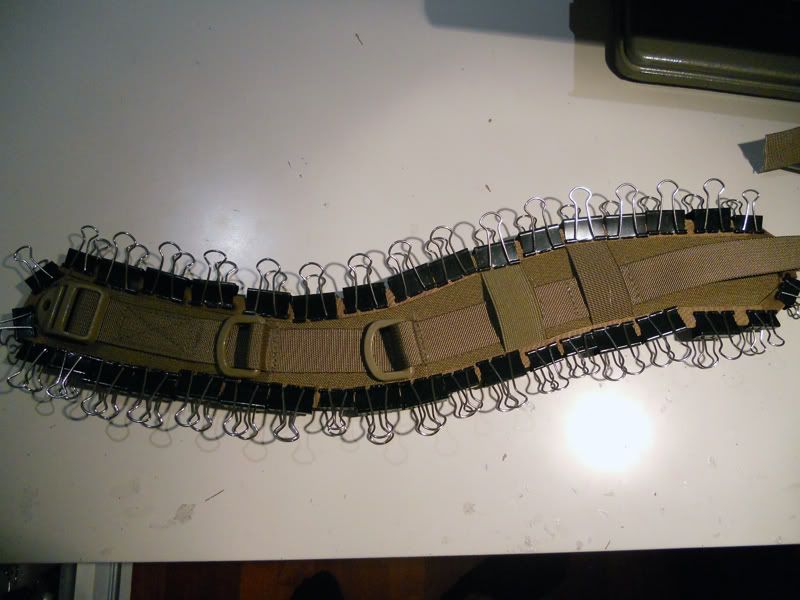
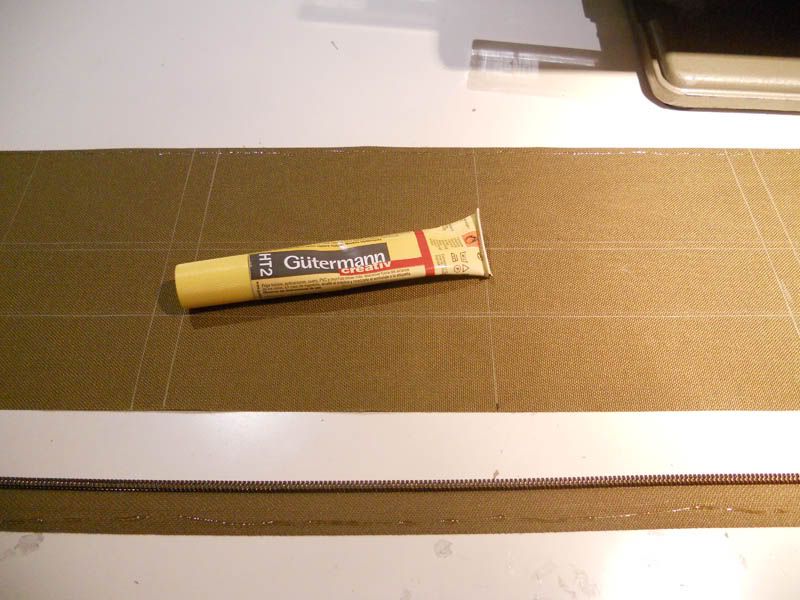
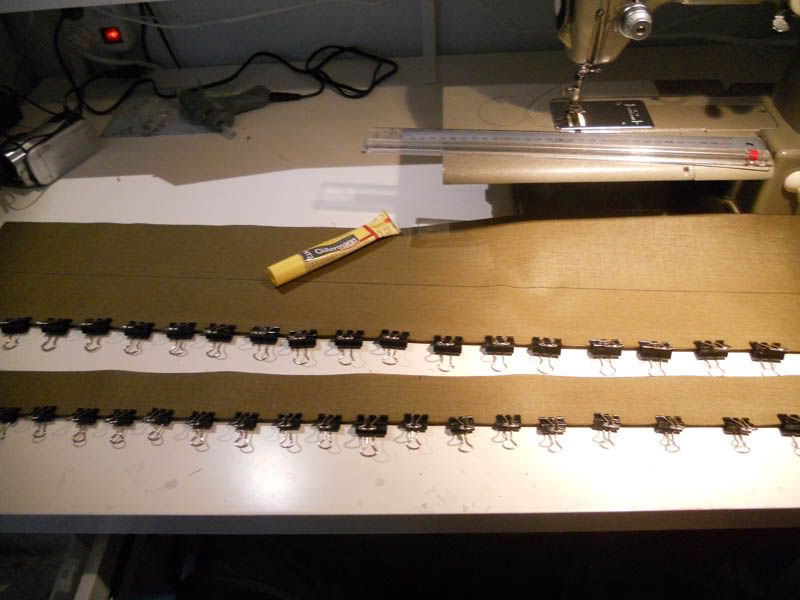
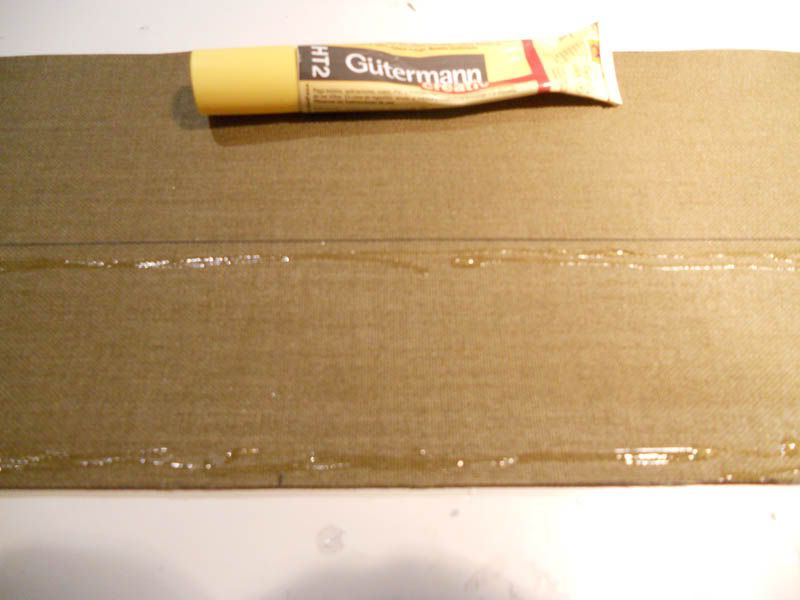
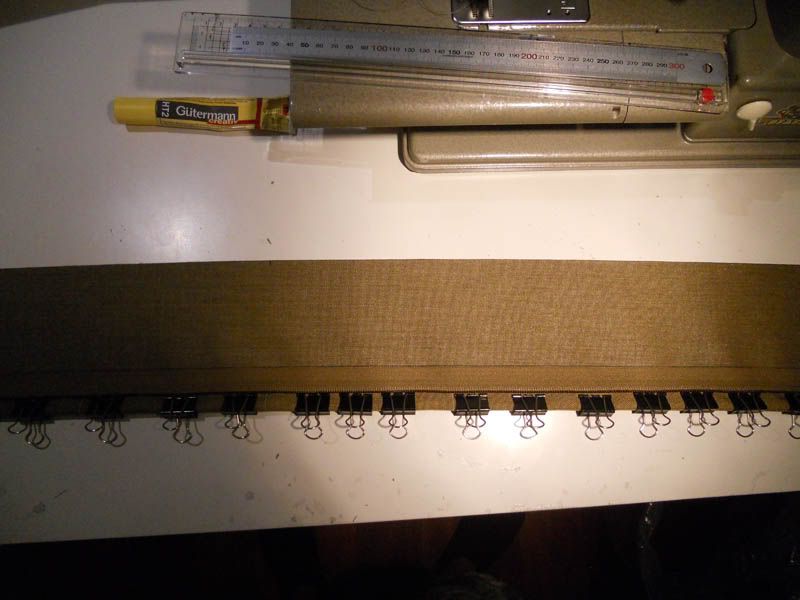
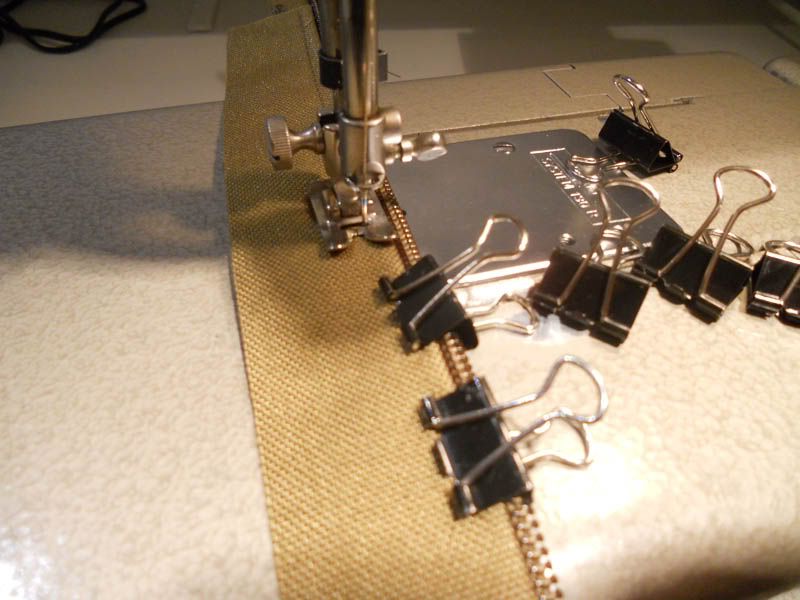
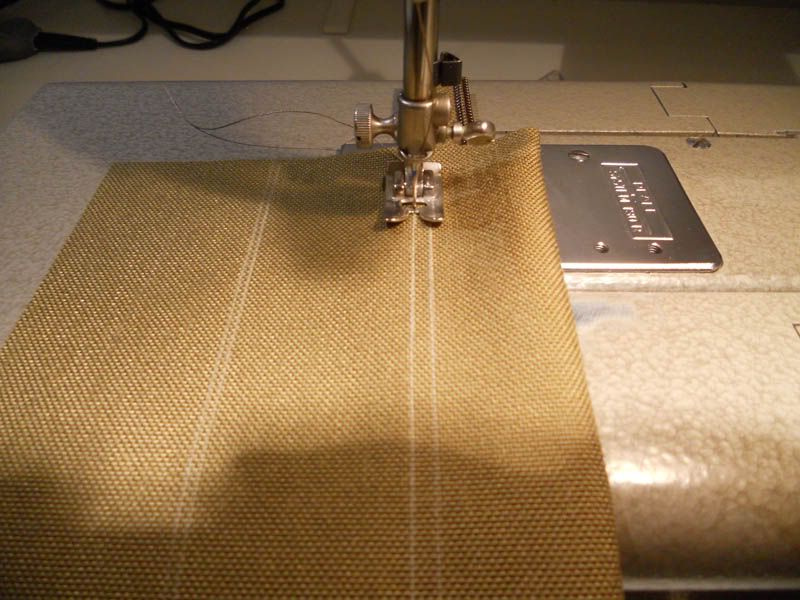
Apply the binding tape. I like to use Guterman´s fabric glue and a whole lot of paper clips to tack it in place. After the glue has dried (it only takes a few minutes) it´s pretty easy to sew down the binding tape. If you have vertical webbing/elastic in the straps like I have here, remember to double back over them, so they will be triple stitched. For the binding tape, I used two lines of stitching, one close to the edge of the tape, another one close to the edge of the strap.
[IMG]
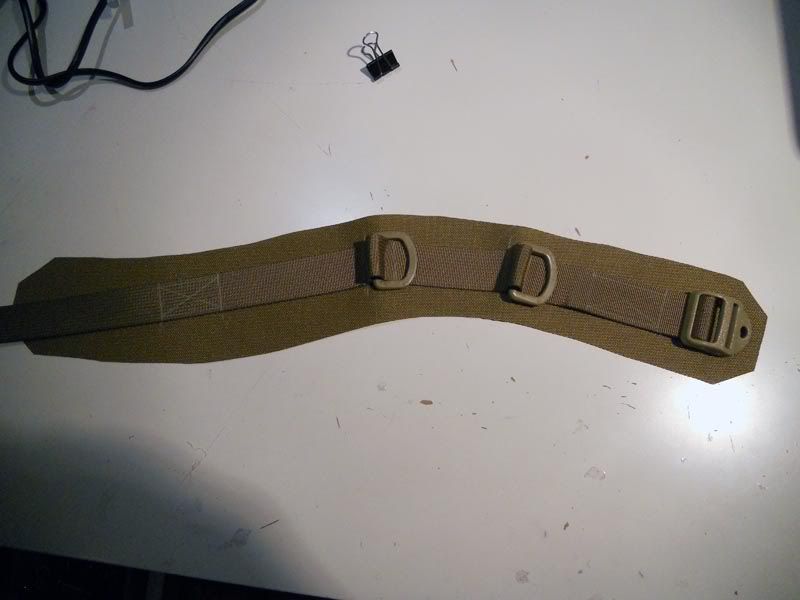
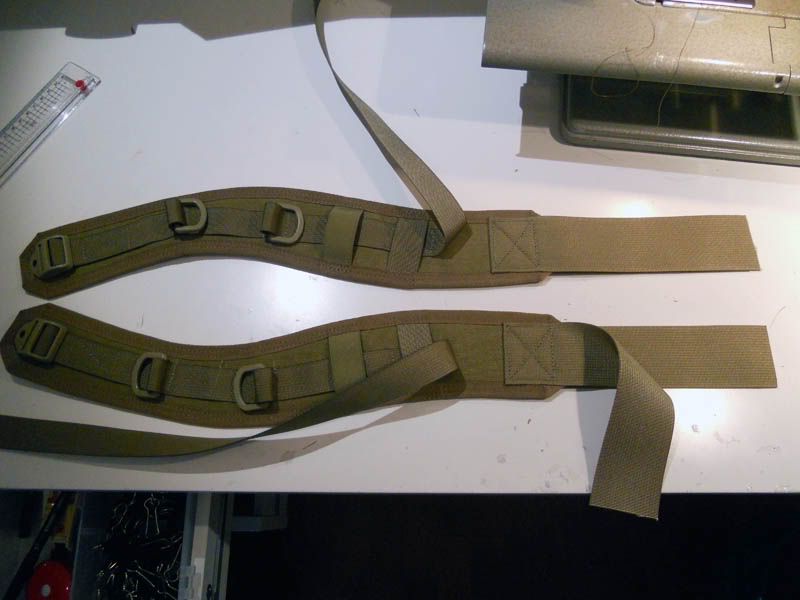
Box-x two pieces of 2” webbing into other end of the strap (the end which goes closer to the body of the pack) The straps will be attached from these 2” webbing into the body.
[IMG]
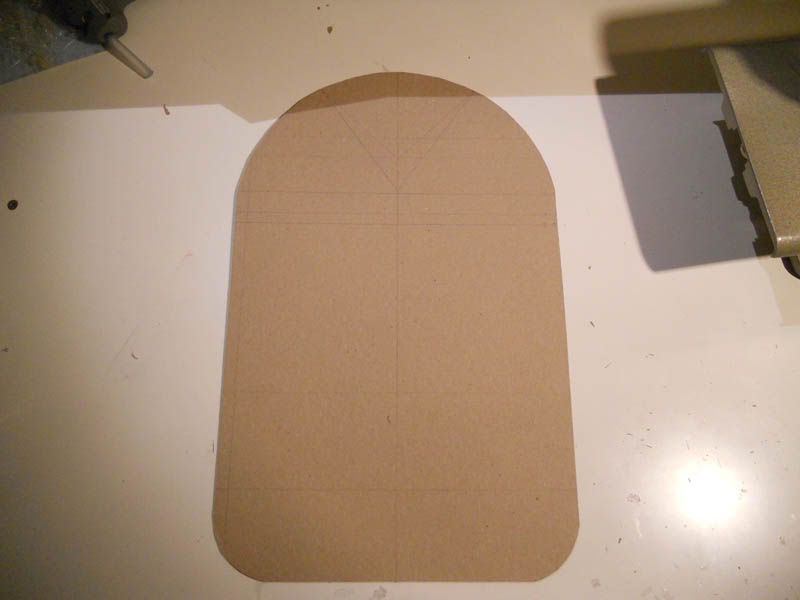
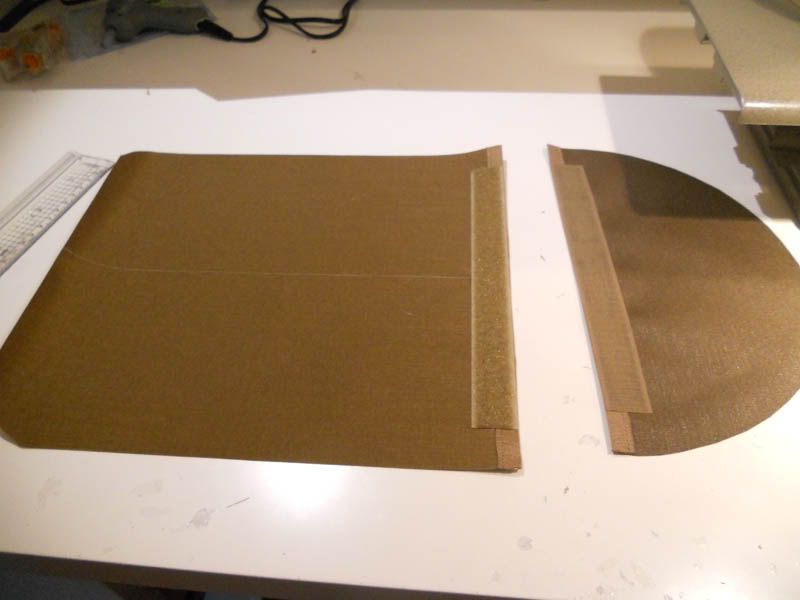
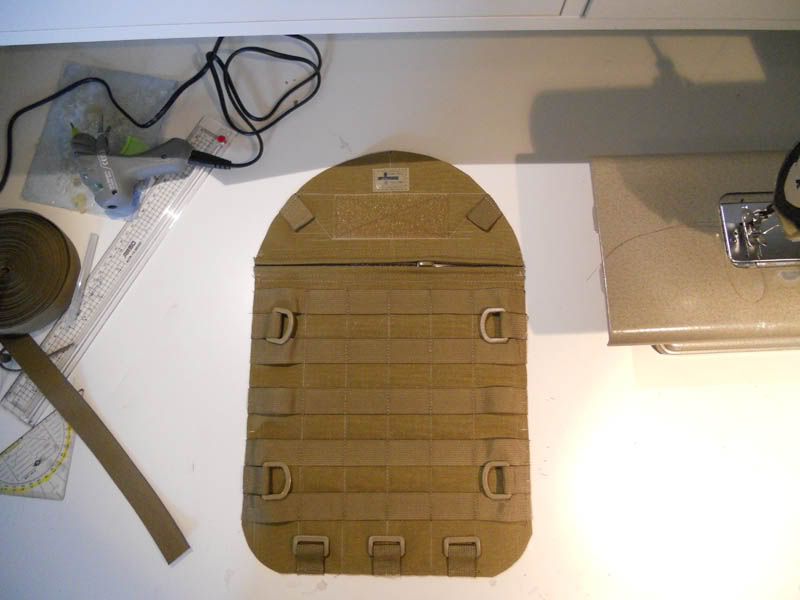
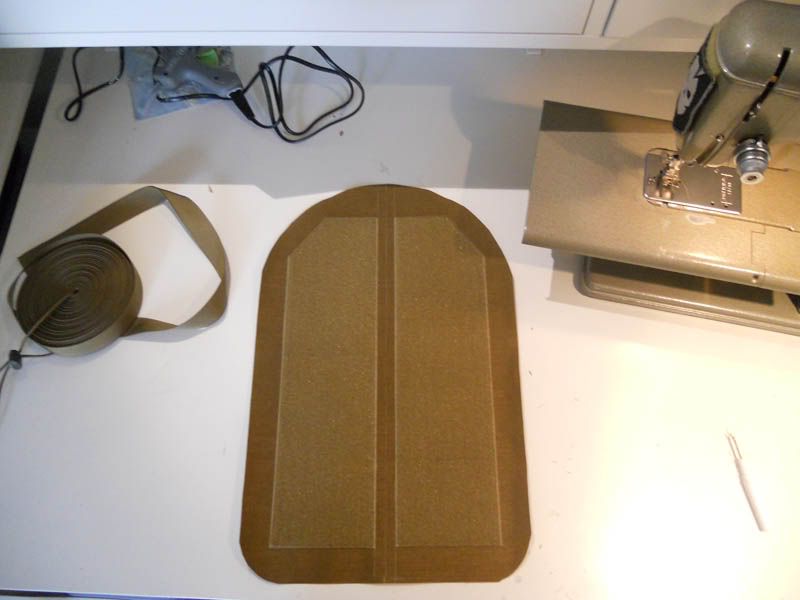
Make a template for the backpanel (same works with the front piece as well). Here´s what my template looked like. It´s measures are Height: 44cm Width: 28cm. I used a 1 cm seam allowance, so the end product is somewhere around 42cm/26cm
[IMG]
For the outer layer, I used 1000d cordura, and for the inner layer, I used 500d cordura. Cut one each.
Hot glue and box-x the straps into the outer layer of the backpanel (the 1000d). After that, sew a 2” webbing over the part where the straps attach to the backpanel (shown 2 pictures below)
[IMG]

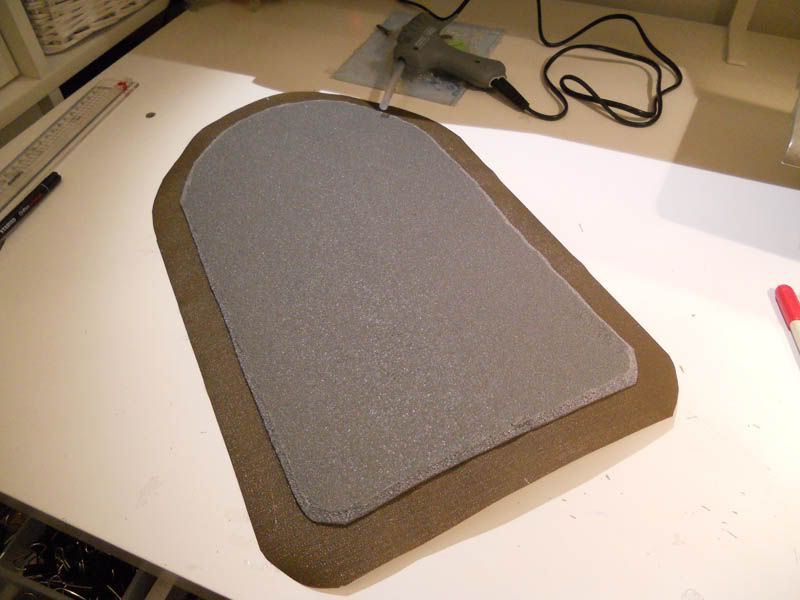
Hot glue the padding for the backpanel in place. After that, tack down the inner layer of the backpanel over it (forgot to take a picture of that, sorry)
[IMG]
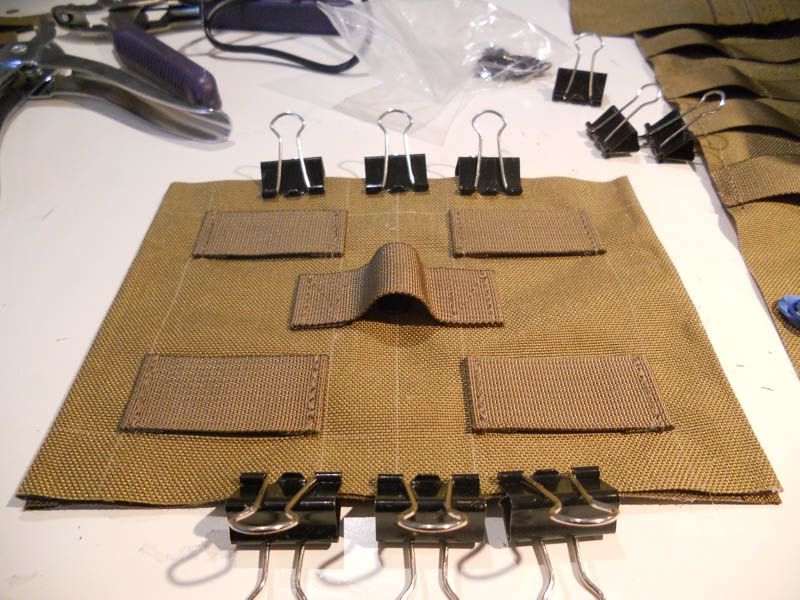
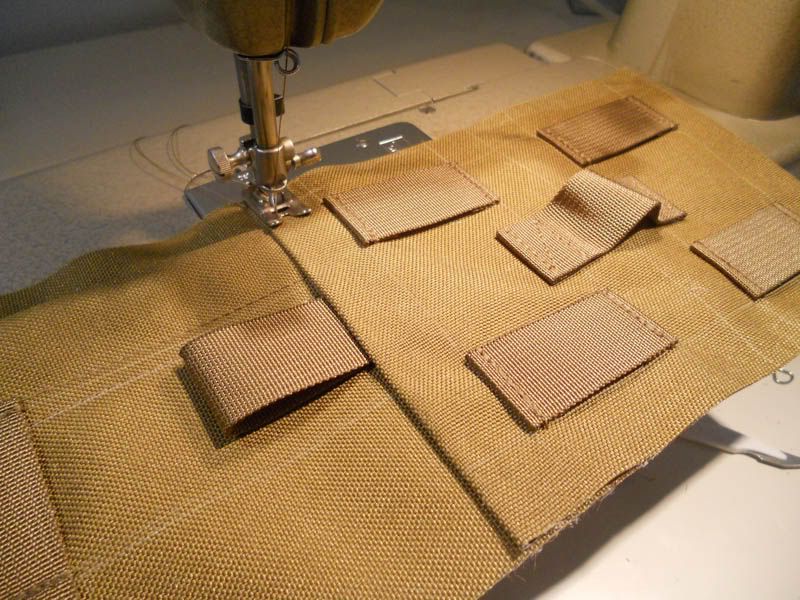
If you want to, you can now sew some ”airchannels” into the backpanel.. Whether they actually allow any airflow is questionable, but they will help stiffen the backpanel, and give the pack a more finished look. You can skip this part if you want to.
[IMG]

Then we will make a pocket/sleeve for the frame sheet. In some commercially made packs, the pocket for frame sheet is also meant to accommodate a hydration bladder. However, if you want to do that, you have to add pleats into the pocket.. Otherwise, when you put a full bladder inside of it, the backpanel will bulge out. Surprisingly, there are a lot of commercial packs where the frame sheet/hydration pocket is made without pleats.
[IMG]
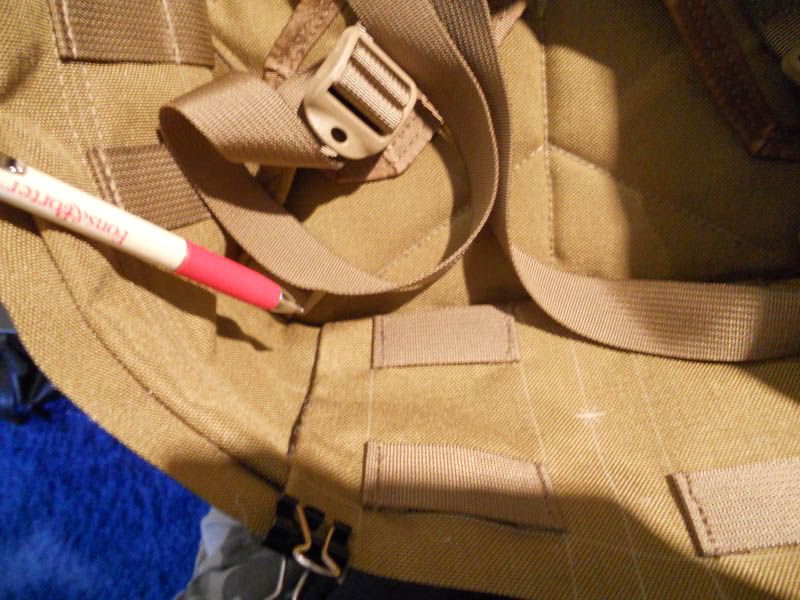
Tack the frame sheet pocket in place using fabric glue. I also added some looplocks for tying down stuff (the two on the top part of the pack are for TAD`s admin panel). That webbing+triglide combination is for attaching a hydration bladder.
[IMG]
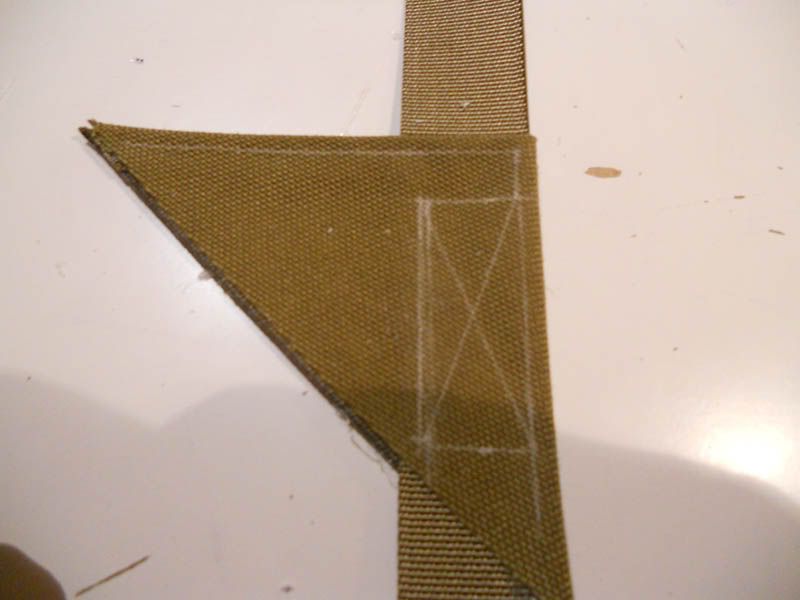
Then we will attach the webbing which goes into the shoulder straps, into the backpanel. If you want to do it properly, this is pretty much the only way to do it.
We will start out by making a triangle. Fold the long side of the triangle. Tack down the webbing. Fold the other side of the triangle. Box-x the webbing. Then tack down the triangle+webbing combination into it´s appropriate place.
[IMG]

[IMG]
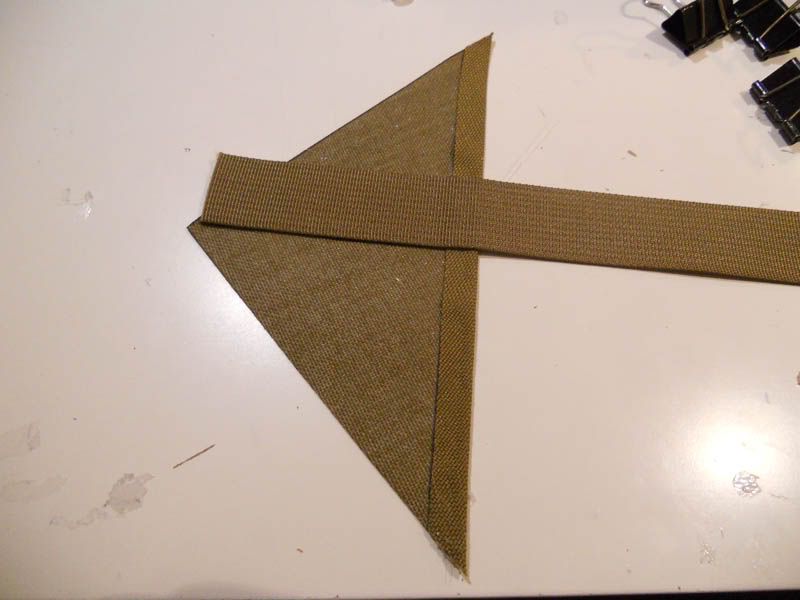
[IMG]
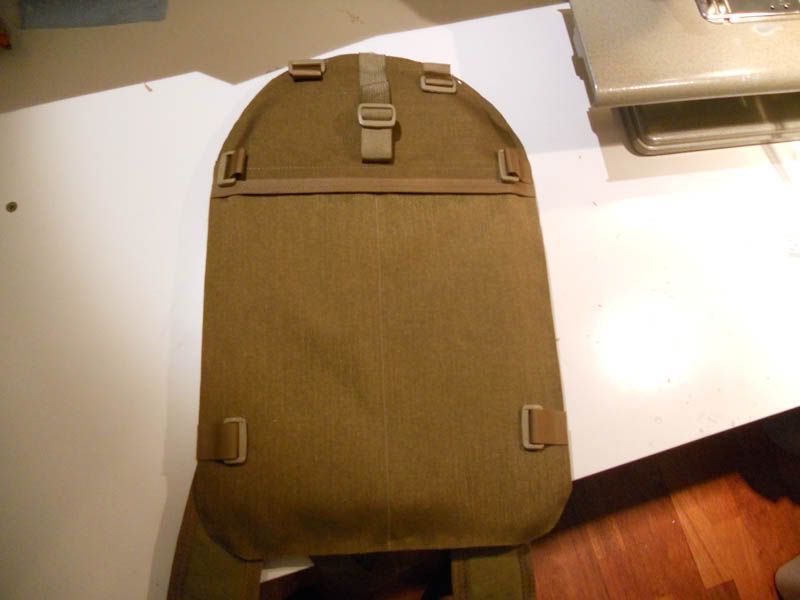
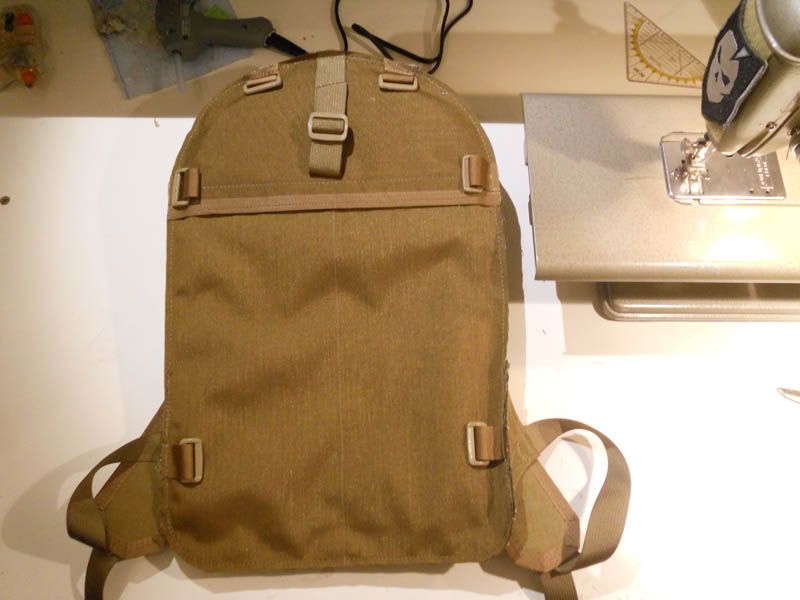
Here´s how it should look like once finished:
[IMG]
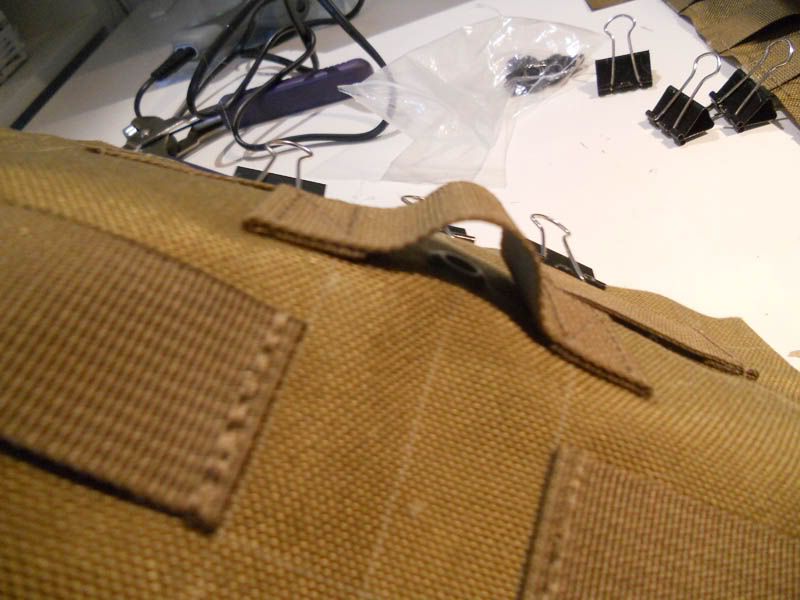
If you want to, add attachment points for the sternum strap (forgot to take a picture a picture, but I will see them later on.
Now you can sew around the backpanel and it´s finished.
[IMG]
Measure the dimensions for the side piece. This is a clamshell type of pack, so the zippers should go under the pack.
[IMG]
The length for the side piece for my pack was 110cm
Then we have to determine the width of the side piece. I wanted the other side to have a storm flap. Also, I wanted the side which is attached to the backpanel, to have two columns of Pals.
The other side which attaches to the front piece, is much narrower
Then cut the side pieces
[IMG]
[IMG]
[IMG]
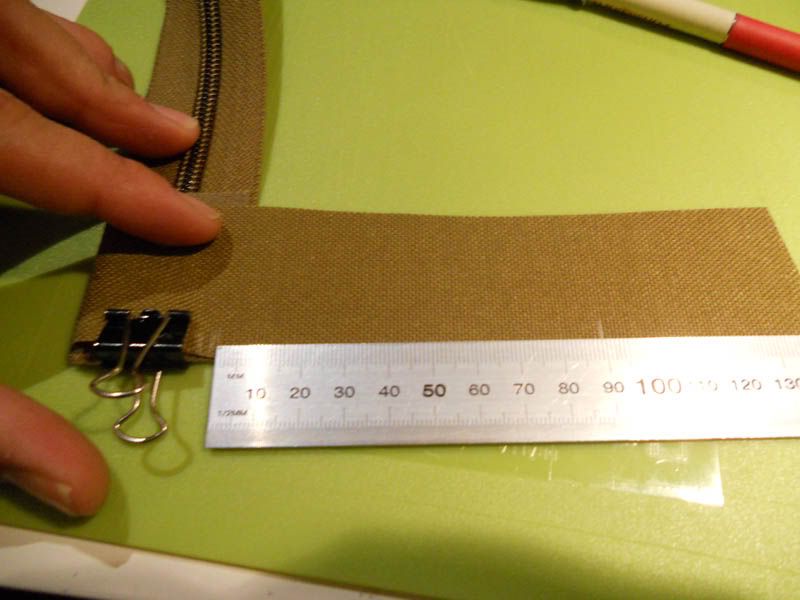
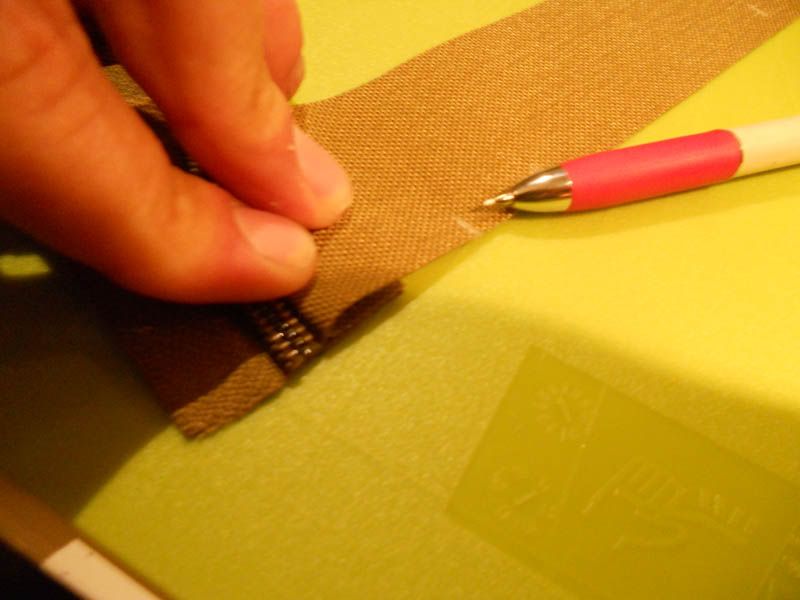
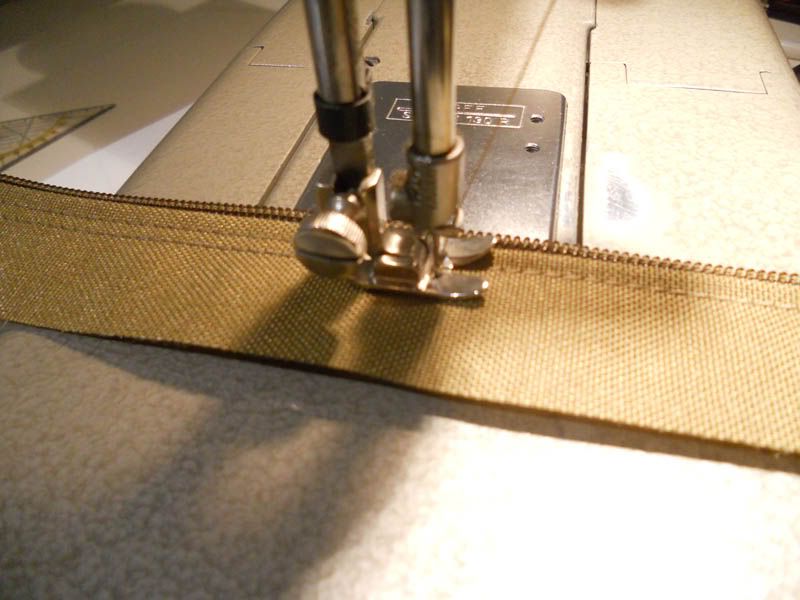
Tack down the zippers (#8 is a nice all around size) with hotglue or fabric glue.
[IMG]
[IMG]
The storm flap fold
[IMG]
[IMG]
Sew the zippers in place. Use two lines of stitching (one line is too few, 3 lines is too many)
[IMG]
[IMG]
[IMG]
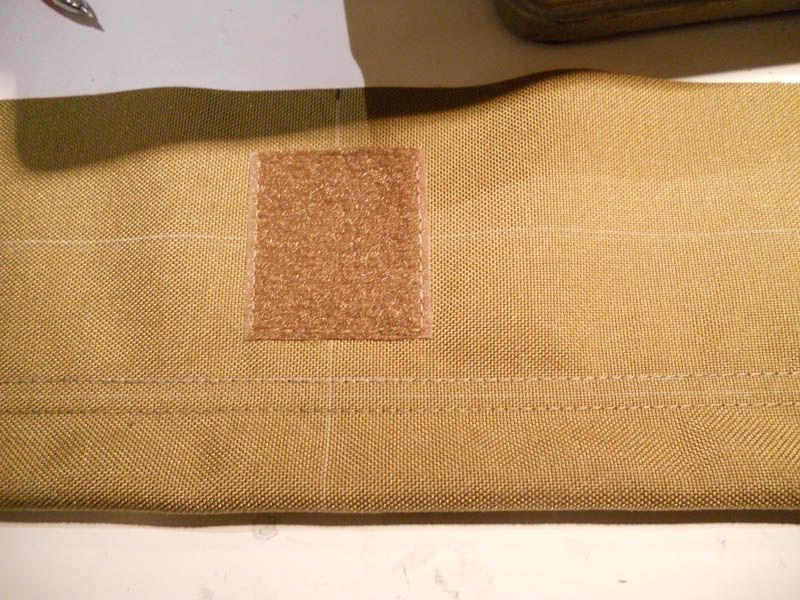
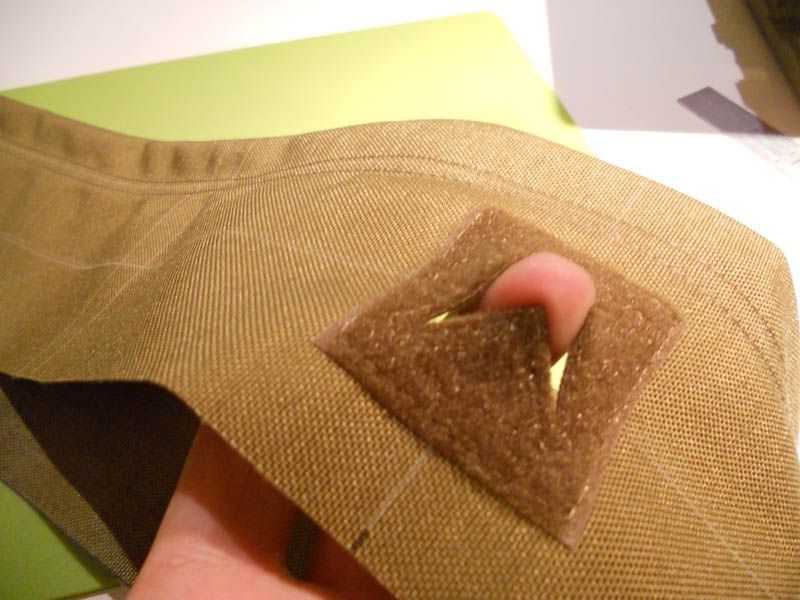
Hydration port: Sew a piece of Velcro, exactly in the middle of the side piece. Sew around it.
[IMG]
Turn the side piece over, mark an X inside the box formed by the stiches. Then make additional markings around the X like this;
[IMG]
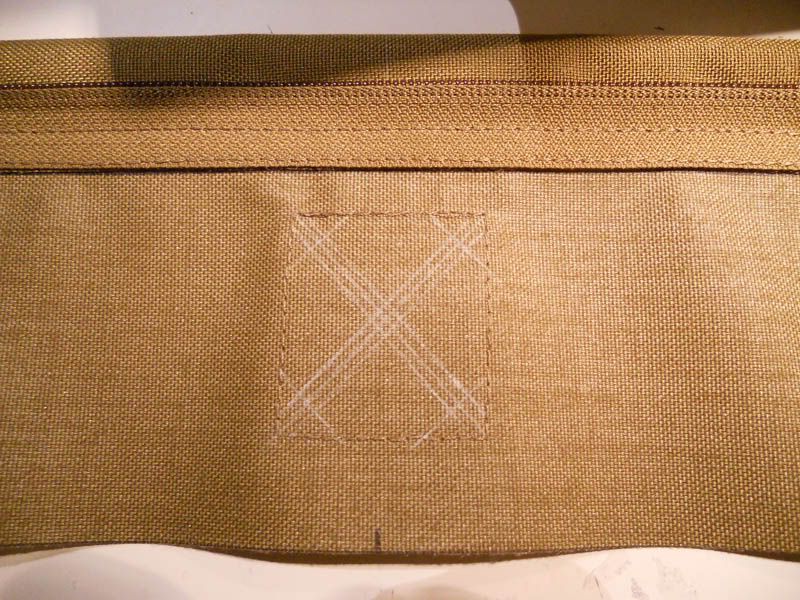
So basically, the middle lines mark where we have to cut through. The lines around it are a reference for stitching.
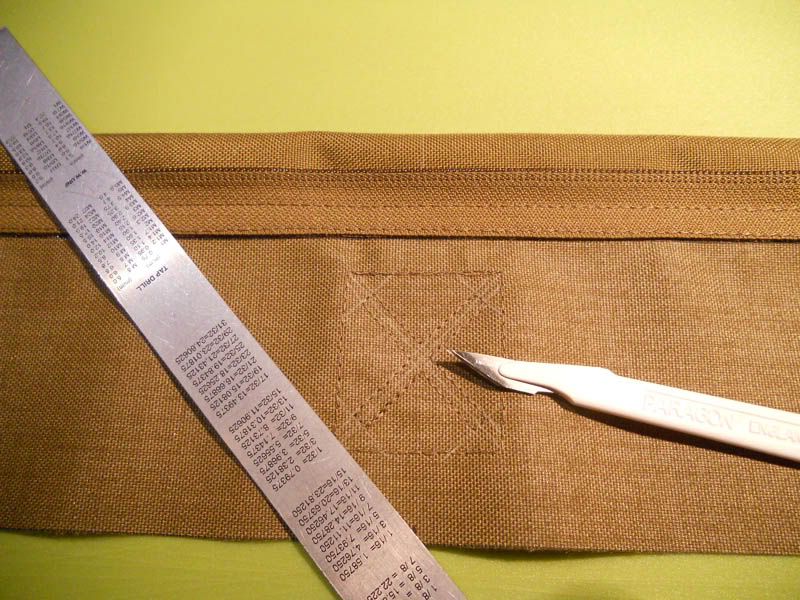
Stitch around the outer lines like this:
[IMG]

Cut an X in the middle of the X which is formed by the stitching, and you will a yourself a hydration port. There are many way of doing the hydration ports, this is just one of them.
[IMG]
[IMG]
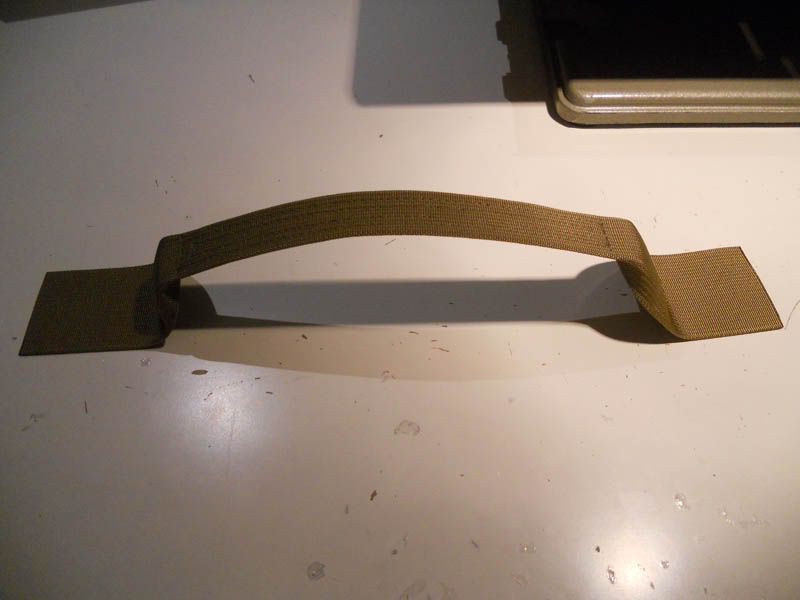
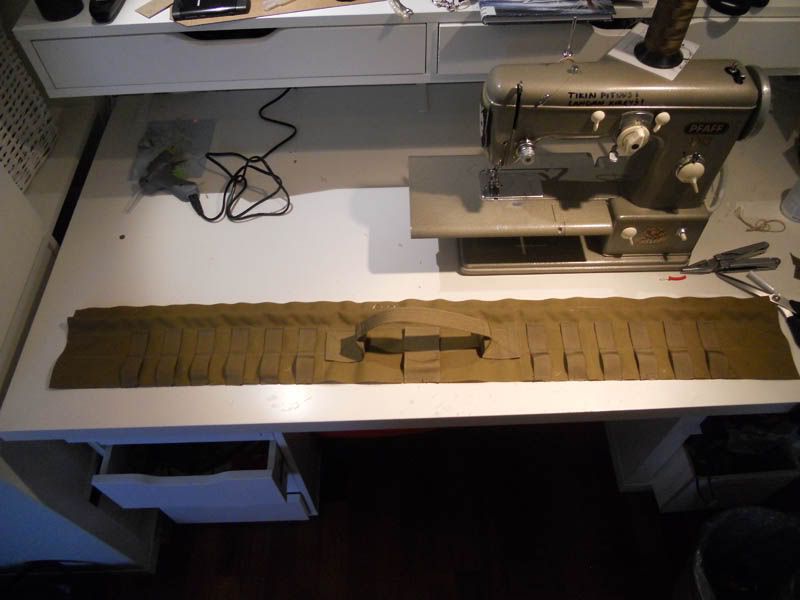
Carrying strap.
Cut a piece from 2” webbing (how long? it´s up to how big you want the handle to be)
Fold the webbing from the middle and sew over the folder area. Tack the carrying strap into it´s appropriate place, and then box-x it.
[IMG]

[IMG]
Sew down any pals webbing or what ever you want the side of the pack to have. Attach both sides with the zippers Now the side piece is ready.
[IMG]
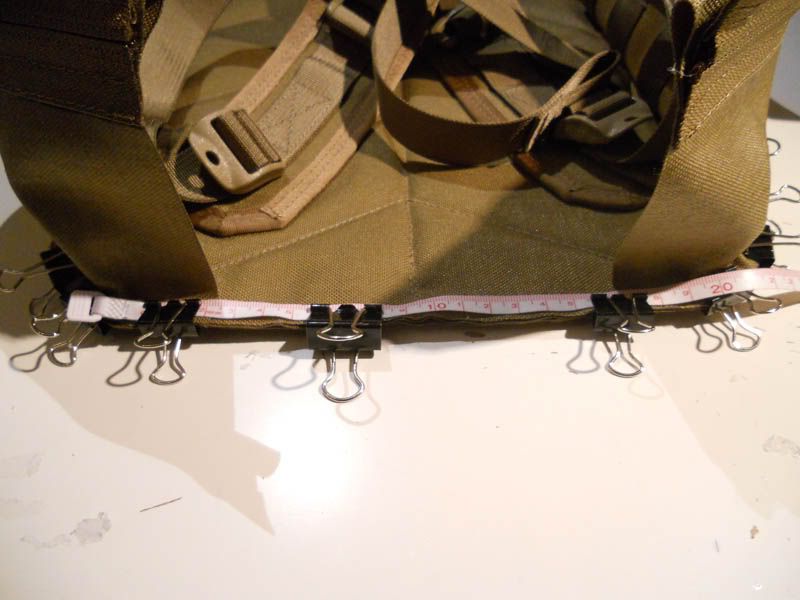
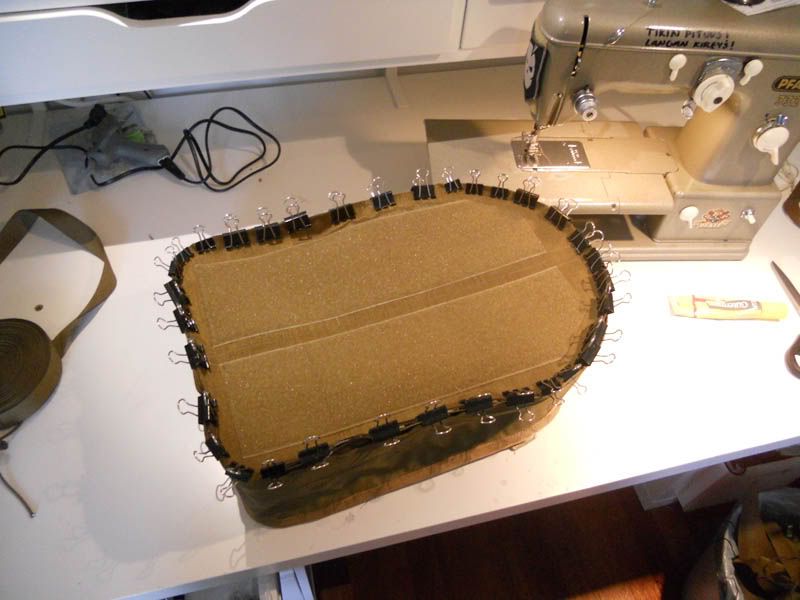
Attach the side piece into the backpanel with paperclips to determine the measurements for the bottom piece. With this pack that dimensions were width 20cm +2cm for folds and the height; 14,2 cm ( that´s how wide the side piece is, with both sides of the zippers attached).
[IMG]
Make the bottom piece. I usually give it two layers and sandwich the side piece in between them. Again, outer layer from 1000d and the inner layer from 500d
[IMG]

Attach the bottom piece into the side piece+backpanel combination with paper clips and mark the lines where you have to sew the bottom and sides together.
[IMG]
Sew any webbing you might want the bottom piece to have. Install a grommet if needed.
[IMG]
[IMG]
Tack down the side piece into the bottom piece. It´s now sandwiched in between the two layers of the bottom piece. Sew.
[IMG]
Do the same for the other side
[IMG]
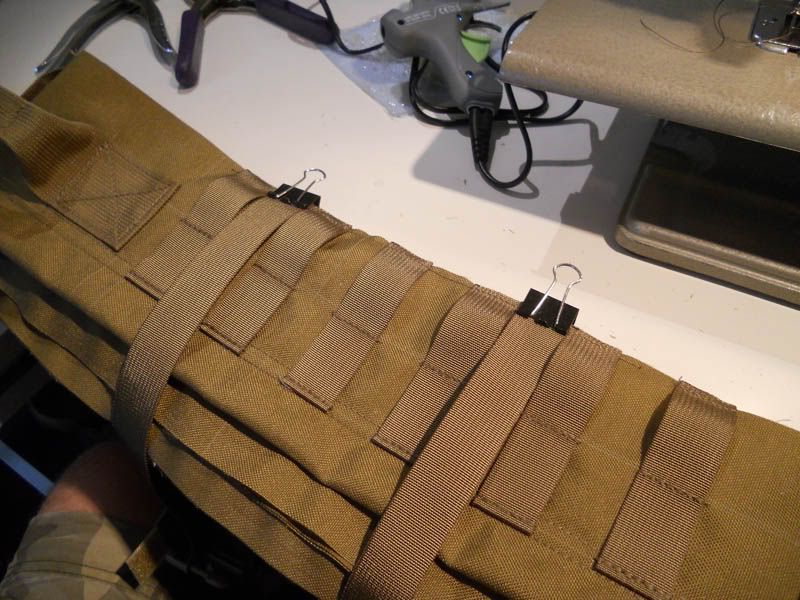
Tack down the compression straps to the sides (4 in total)
[IMG]
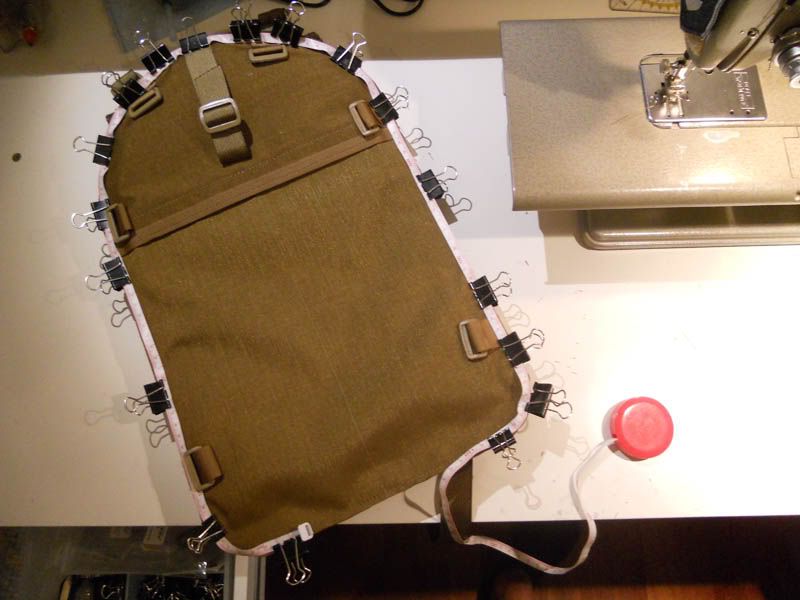
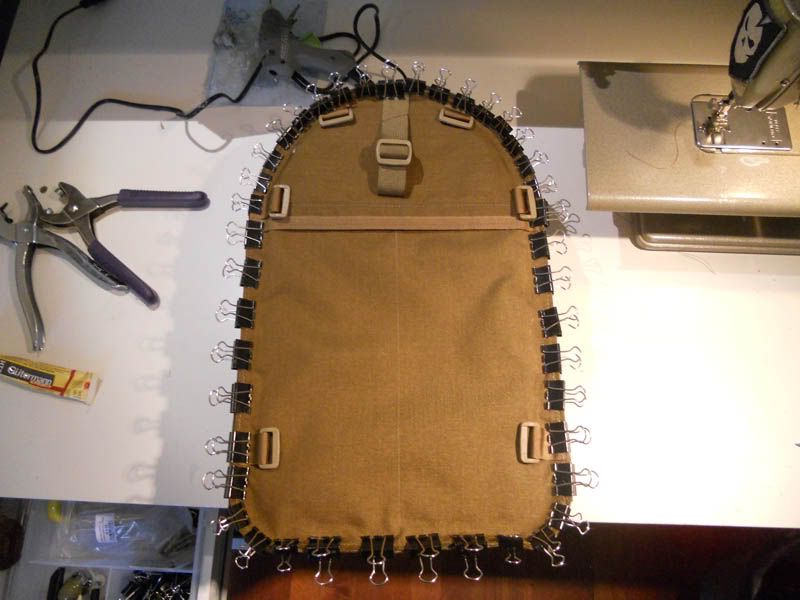
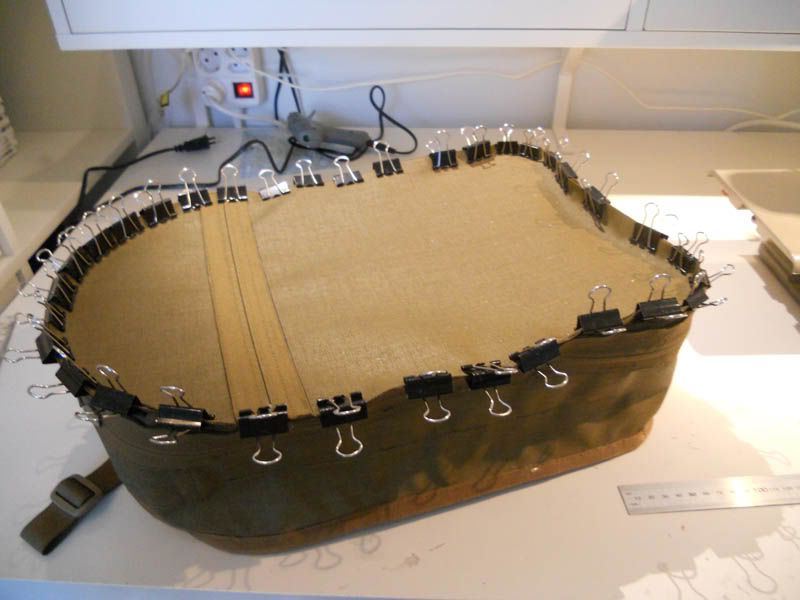
Attach the finished side piece into the finished backpanel with paper clips. See that it fits perfectly. It HAS to to fit perfectly. If it doesn´t fit, it´s not too late to make adjustments.
[IMG]
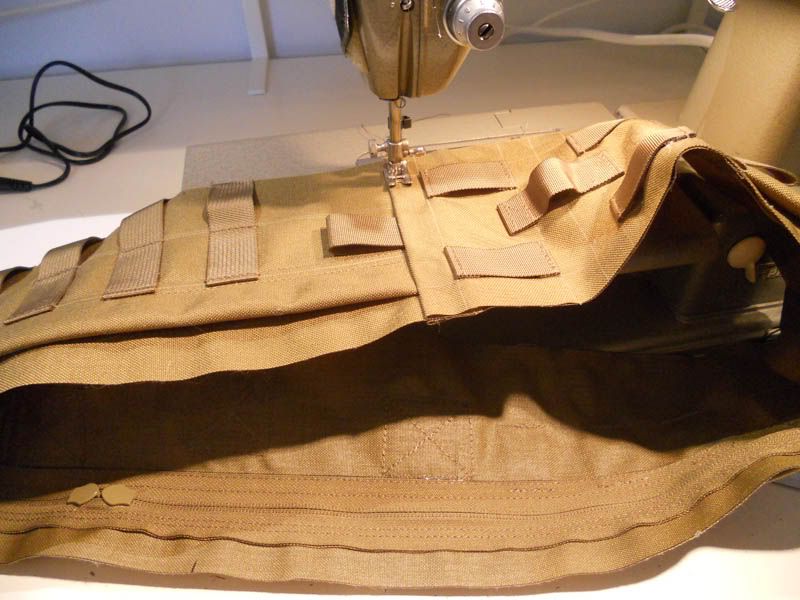
Sew the side piece into the backpanel. After first line of stitching, fold the sides over and inspect the seam to make sure everything looks ok. If everything is ok, sew another line of stiches, Then apply the binding tape (not shown here) and sew it in place (again, I used fabric glue to tack down the binding tape)
[IMG]
[IMG]
Attach the other ends of the compression straps, if you haven´t done it before
[IMG]
Here´s what it should look like before binding the seam.
[img width=599 height=800]
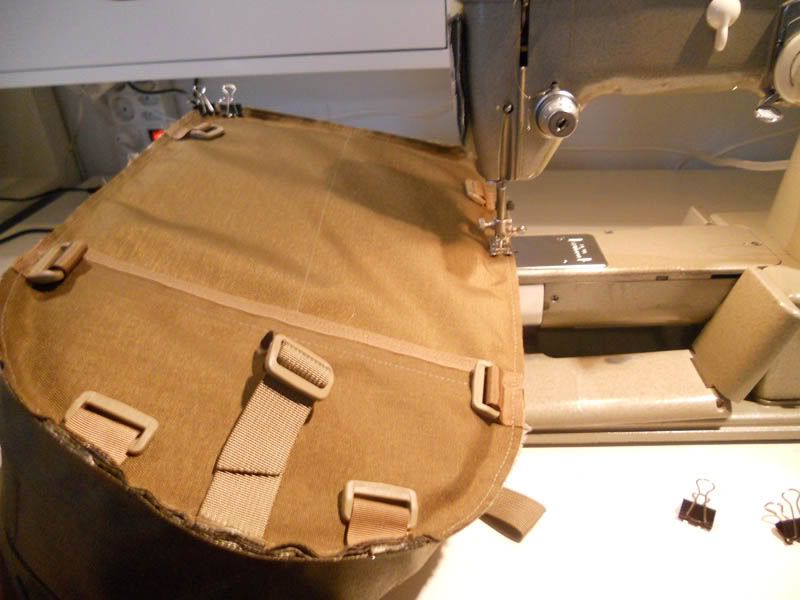
Make the front piece. Those two loops of webbing at 10 and 2 o´clock and those 3 looplocks at the bottom are for attaching a beavertail, don´t mind them. I also made a zippered pocket into the front piece. Before I sewed down the pals, veclro and the other stuff, I attached the front piece into the side piece+backpanel combination with paperclips to make sure it fits perfectly.
[IMG]
[IMG]
Then make the inner side of the front piece. Now that Velcro backed admin pouches are in fashion (like BFG dappers), I didn´t bother with making any organizing pockets, I just used long strips of velcro.
[IMG]
Tack the outer and inner layers of the front piece togerher, attach it to the side piece+backpanel combination and sew the first line. Then turn the pack over and check the seams. If everything is ok, sew the second line. Apply the binding tape, and you´re done.
[IMG]
Here´s a finished pack with the beavertail on:
[img width=600 height=800]
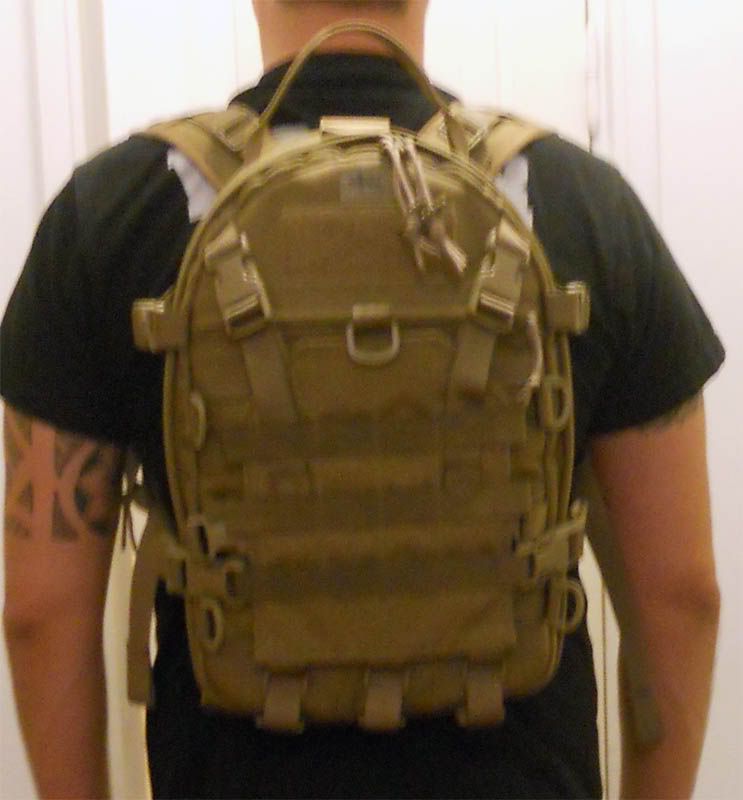
And here´s how it rides on my back:
[IMG]
I hope that some of you guys will find this tutorial useful.
All discussion about different packmaking techniques are welcomed here. If you do something differently, feel free to share it with the rest of us (preferably with pictures to back up the description)


0 comentários:
Postar um comentário