I have seen a lot of names used of these backpanels; ventilated backpanel, backpanel with airchannels, etc.. I just call them 3d backpanels because i think it´s the most descriptive name.
Making those is actually a lot easier than it might seem at first, as you will see.
Anyway, here´s the tutorial i promised in an earlier thread.
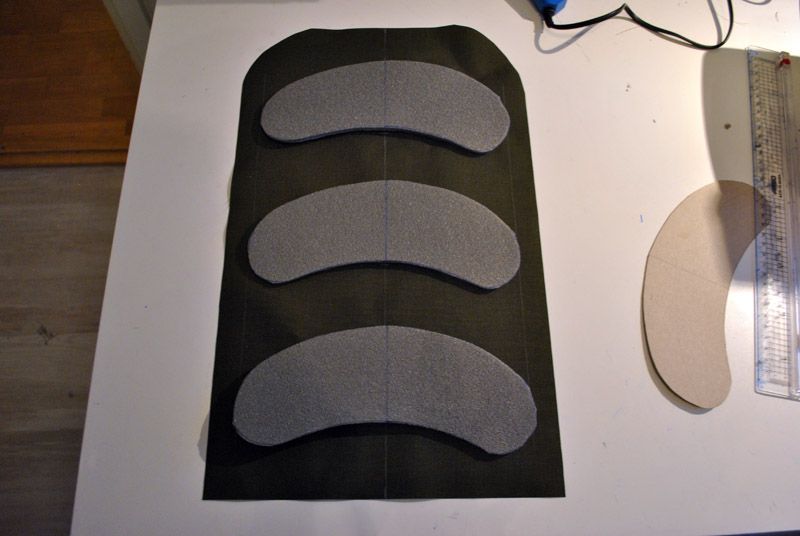
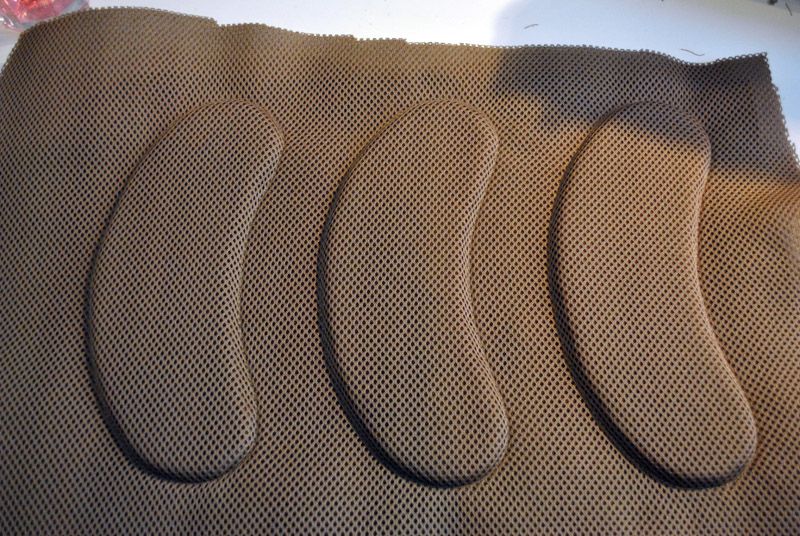
First, here´s how the end result should look like:
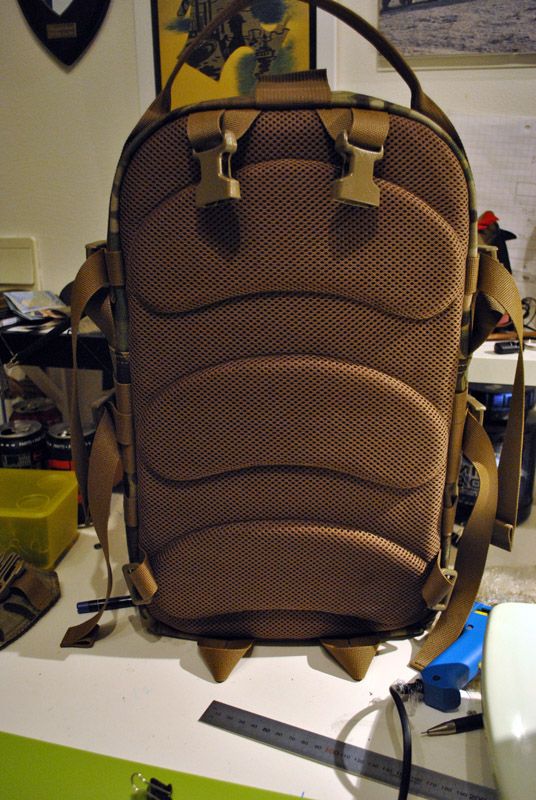

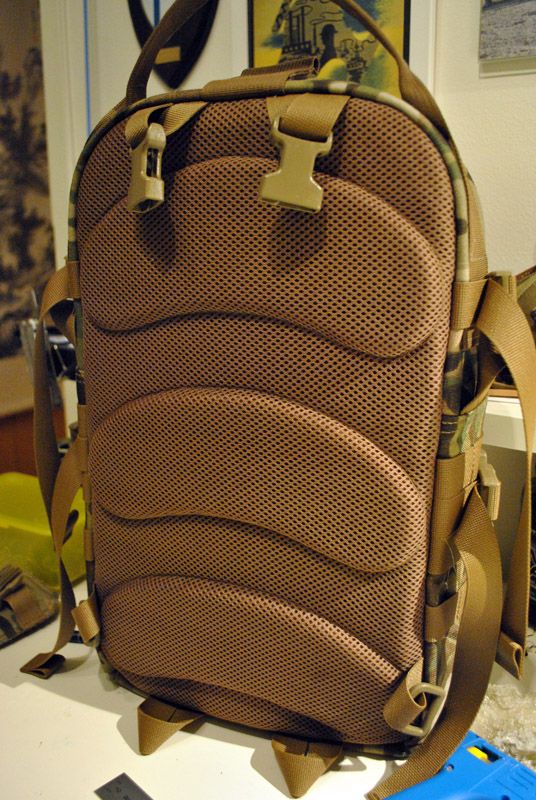
And then, how do we get to that?
(notice that the backpanel in this tutorial is made for a small pack, so i could get away with attaching the shoulder straps into the top seam. This same technique will work if you want the shoulder straps to attach into the backpanel itself, but of course you´ll have to tweak the technique slightly. Also, note that in this technique, the spacer mesh will increase your seam thickness a little bit.. However, if that is a real problem, you might want to rethink your design, anyway )
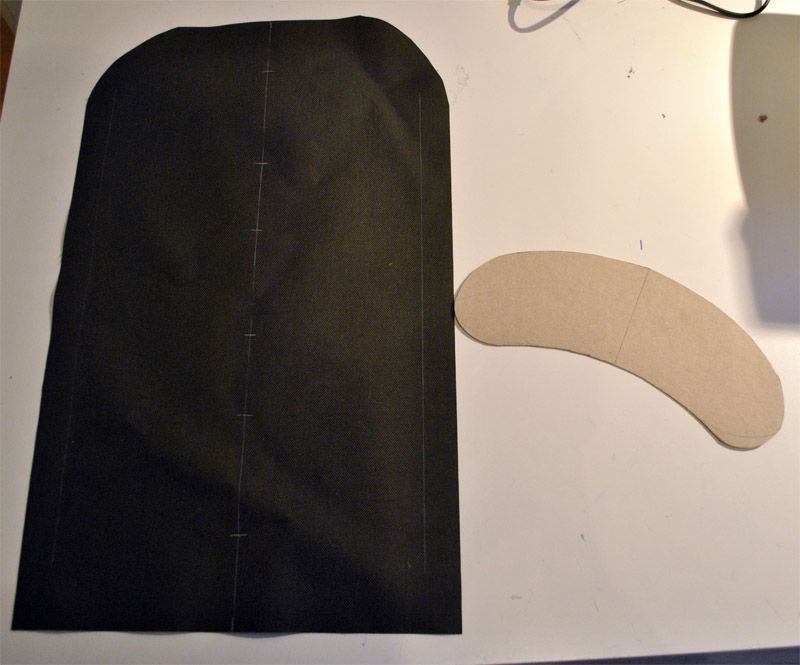
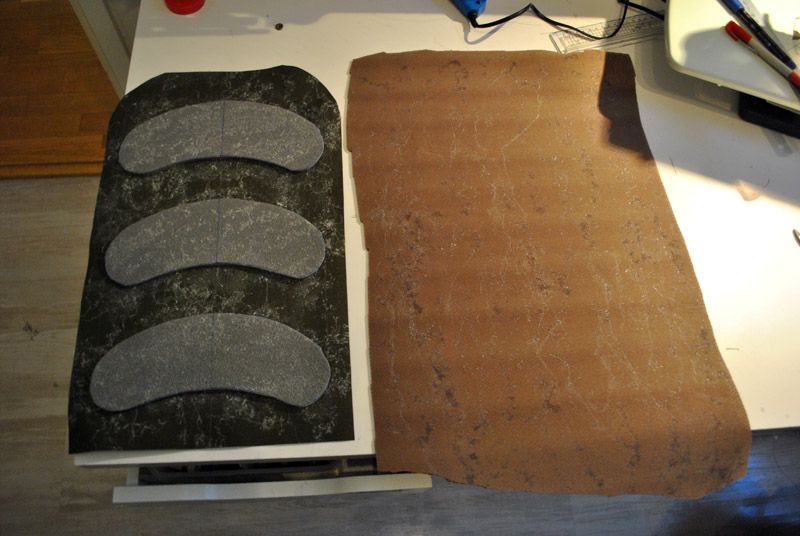
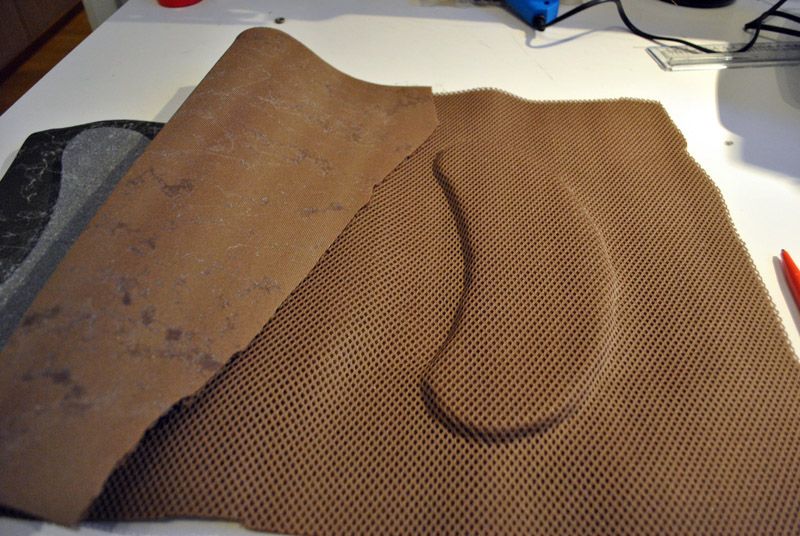
Start by cutting a piece of cordura into the corrrect shape and size as the base of the backpanel. I use 1000d for this, because it shrinks less than 500d. Also, decide the shape of your padding, and make a template out of it (template in the picture next to the backpanel base).
You really want to mark the centerline into the cordura, as well as into the the padding template.. That will help align the pieces of padding later. You also see two lines drawn in the cordura, 2,3cm (short of an inch) from left and right edge of the the piece. That´s my "DON´T GO OVER THIS"-line. I like to leave 2,3cm of free space in between the pieces of padding and the edge of the cordura, so that i have room to work with, when i am putting the pack together.
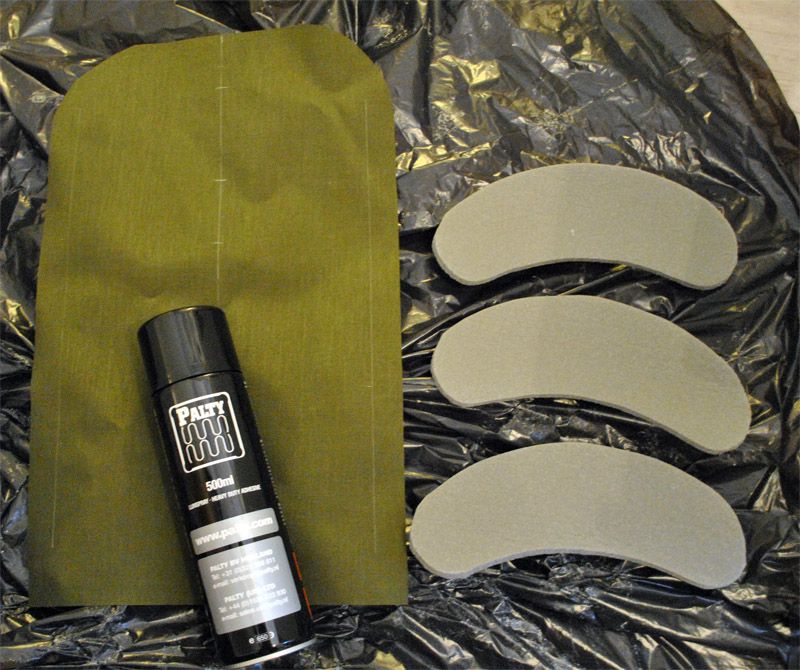
Trace the shape of your padding into closed cell foam (which i will call CFF, from this point on, in this tutorial) and cut them out. I used 8mm thick CFF, but since in this technique we wont be doing any sewing through the CFF, the thickness of it doesn´t really matter; Whatever suits you best. Remember to mark the centerline.
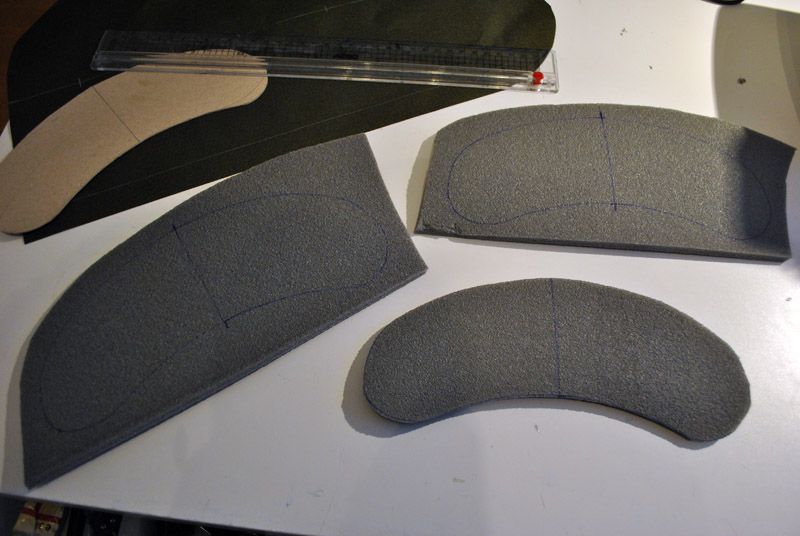
Place the pieces of CFF onto to the base of the backpanel and check that everything looks like it should look
Spray the base of the backpanel and the bottom side of the pieces of CFF, with spray on adhesive. I use an industrial strength adhesive which comes out as kind of like foam, not liquid. The great thing about that is that the adhesive does not soak through fabrics, or even through spacer mesh
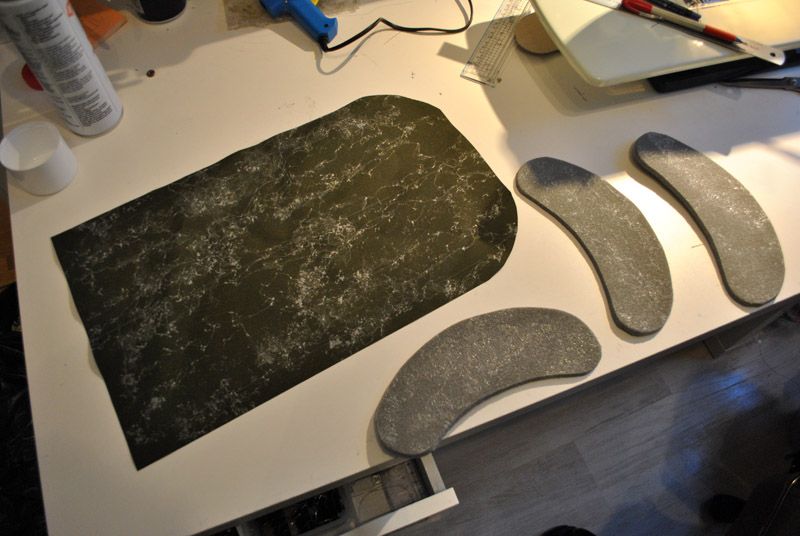
Place the pieces of CFF onto the cordura. With the adhesive that i use, the bond is instantly good enough, so i don´t have to wait for it to dry until i can continue working

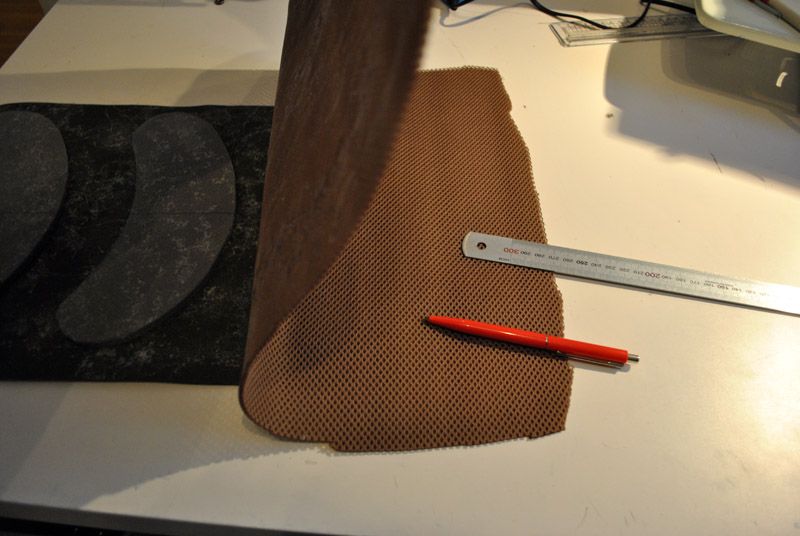
Cut a piece of spacer mesh (under the backpanel in this picture) Remember to cut it big enough. A lot of times when i have tried to save materials by trying to leave excess as little as possible, i have actually ended up wasting materials because the piece that i cut, was not big enough. I use 3mm thick spacer mesh.
Spray the under side of the spacer mesh, and the top side of the pieces of CFF with spray on adhesive
Then the actual work begins: With this kind of backpanel design, i like to start from top or bottom.. Since the pieces of CFF contour downwards, starting from top was a natural choice. Lay the spacer mesh on top of the backpanel/CFF combination, and smooth it out with your hand. Work your way towards the first piece of CFF.
When you get to the CFF, use a tool to press the spacer mesh into the side of the CFF. I use a pen at first, and then i will finish it with a rounded end steel ruler. I don´t think there are one and only tool for this; whatever works for you.
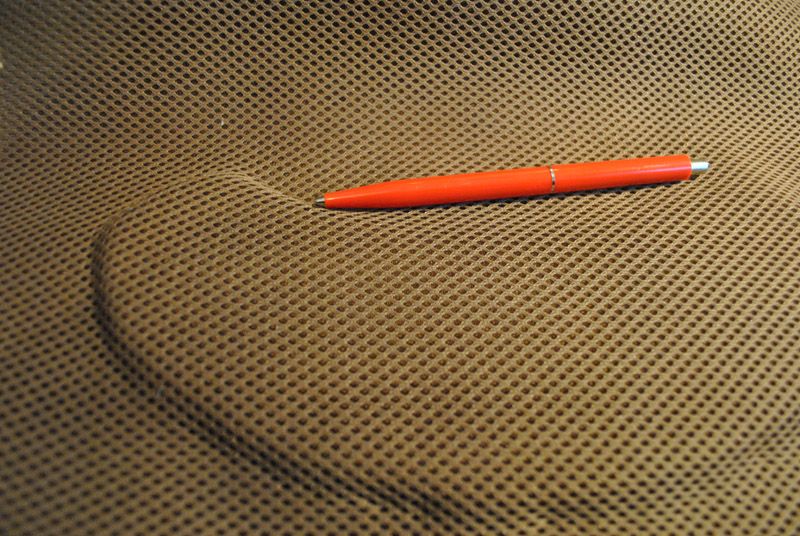
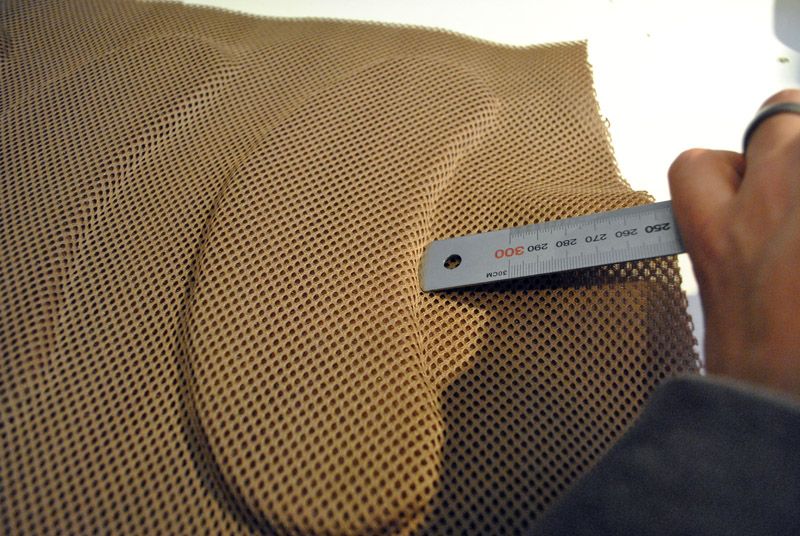
Now we are done with the first piece of CFF
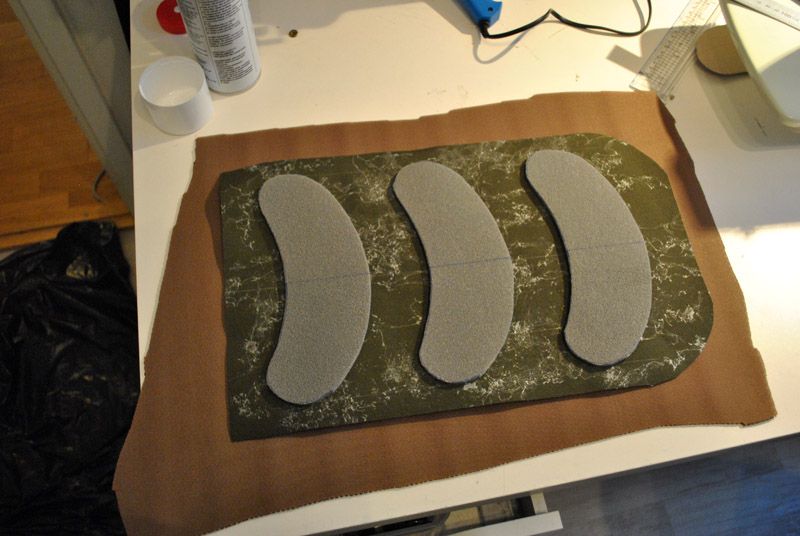
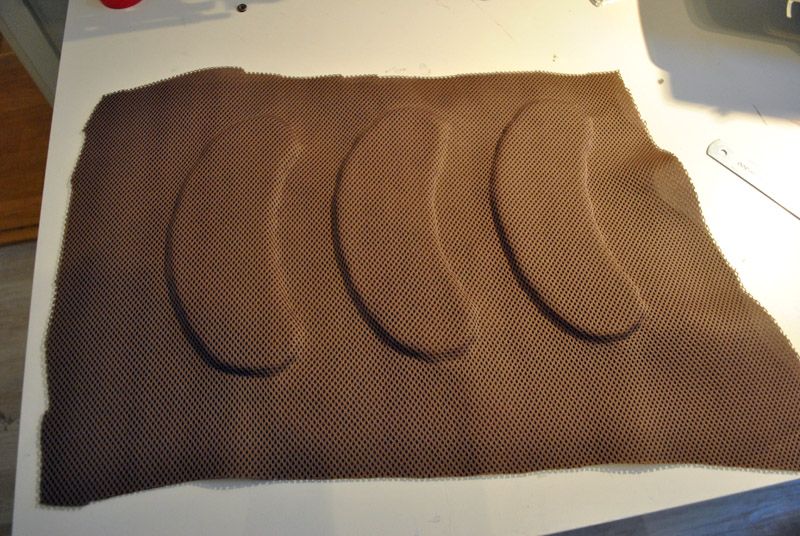
Do the same thing for other pieces of CFF, and the end result looks like this: (notice that the "seam" of the spacer mesh and the pieces of CFF is not very sharp at this point.. but it doesn´t have to be; that´s why we have sewing machines)
Leave the almost finished backpanel to dry for a sufficient amount of time. For obvious reasons, you don´t want to sew through the backpanel until the adhesive has dried.
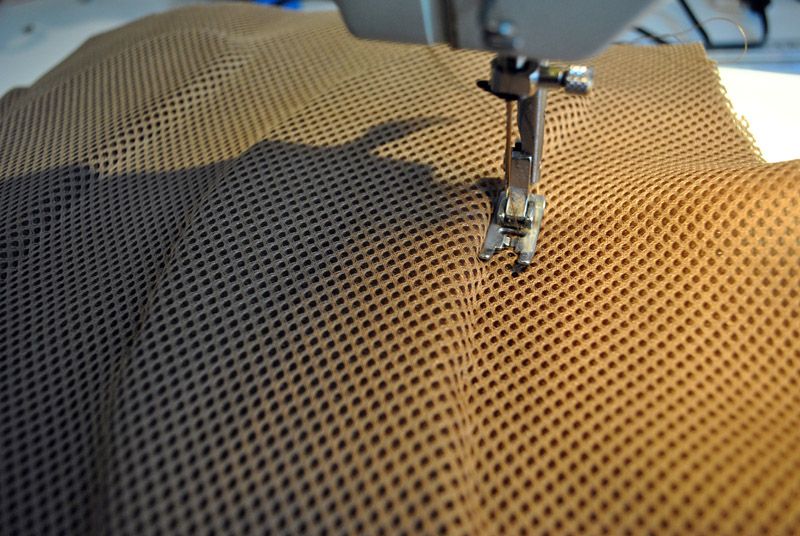
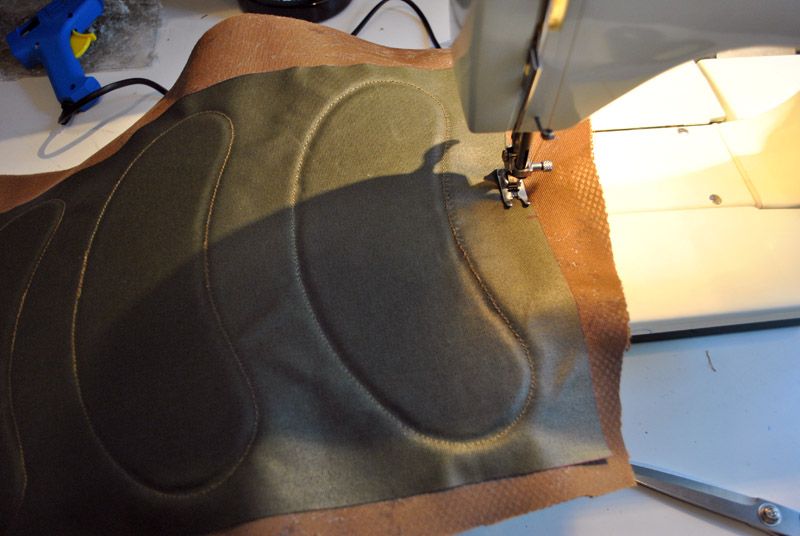
After the adhesive has dried, we will sew around the pieces of CFF. If your machine has an option to move the needle position, move the needle as close the the CFF as possible. If not, use a smaller foot (a zipper foot or something.)
When you sew, make sure that the foot of your machine is always in contact with the edge of the CFF (don´t really know how that works out with walking foot machines)
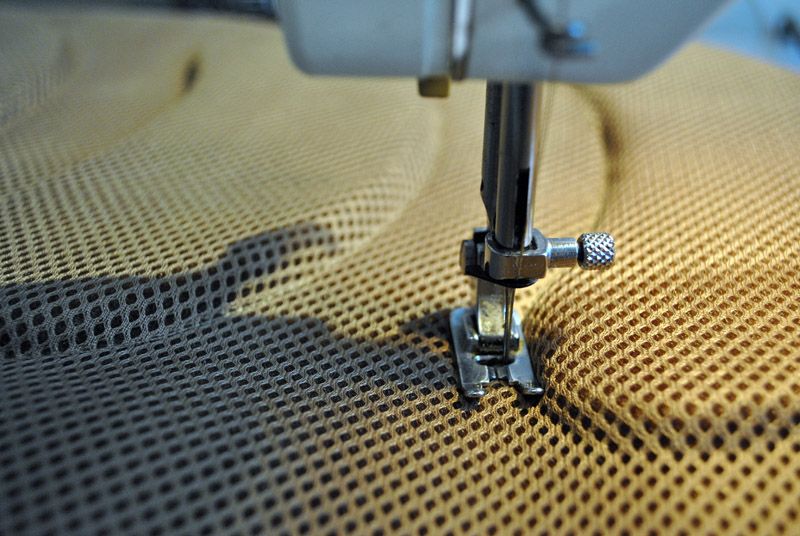
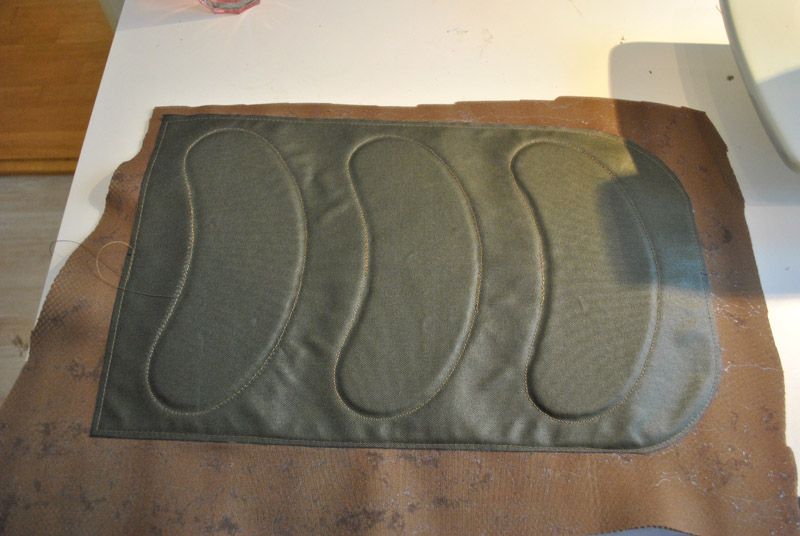
After you have sewed around all the pieces of CFF, the result should look like this. Notice that the seam of the spacer mesh and the pieces of CFF is nice and sharp, now that we applied the stitches
Flip the backpanel around, and sew along the edge of the cordura
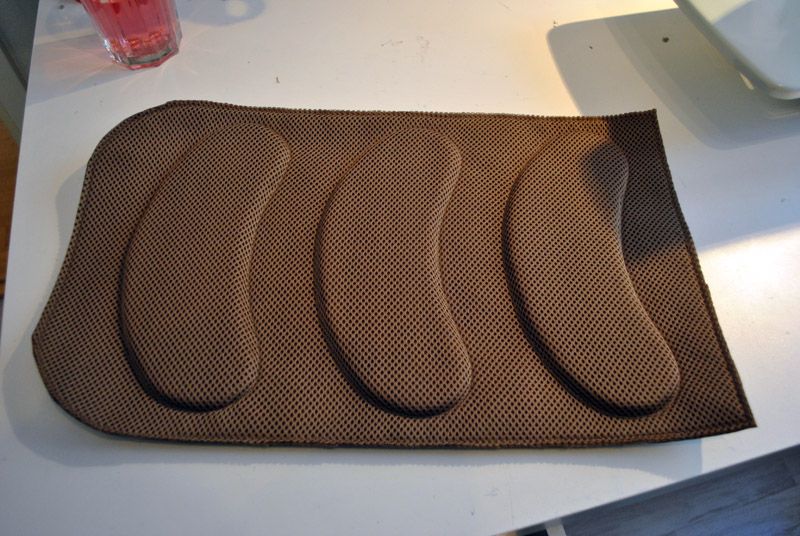
Then, just cut off the excess spacer mesh, and you´re done!
(But of course your backpanel is not completely finished yet; you still have to finished the other side.. I usually sandwich a a piece of CFF that is cut into the shape of the backpanel (of course, cutting it 2,3cm smaller from all around, than the backpanel), between this layer that we just finished, and a layer of cordura)
Now, if you really want to show off, you can use this technique for more complex CFF shapes as well;
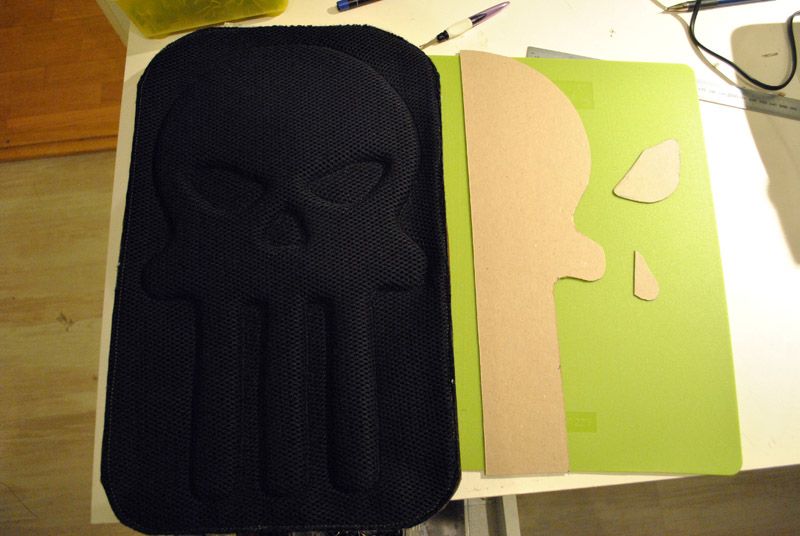
This punisher skull backpanel is made by using exactly the same technique. Instead of trying to make a template of the whole skull, i made a template of only half of it; traced it into the CFF, flipped the template over and traced the other side. I also had separate templates for the eyes and the nose (trying to cut those into the skull template would have been a PITA). You can see the templates on the right.


0 comentários:
Postar um comentário