First I need to state that this IS NOT my method, I read a description of this method by () and gave it a shot. This method is the easiest and fastest that I have ever used to sew rounded corners.
First place a magnetic guide 3/8 or 1/2 inch from the needle, whichever you use for seam allowance (SA).
Then place the spine of your pouch FACE UP on the bed of the machine. (The "spine" being the piece that makes up the top, bottom, and sides of a pouch.)


Next place either the pouch front or back panel FACE DOWN on top of the spine, and line the two up with centering marks. I put centering marks at the top and bottom of the spine but I start sewing at the bottom. So by alining the marks at the bottom, then sewing half-way around I can verify that the whole pouch will be alined properly as long as my top centering marks also line up once the stitch gets that far.
Centering Marks:
[img height=261 width=350]
Centering Marks:
[img height=261 width=350]
Now once lined up, start sewing, but stop at the corner. You should stop as soon as the curve of the corner is about 2-3 stitches away from being inline with the needle’s left side (the exact length you use will depend on your stitch length).
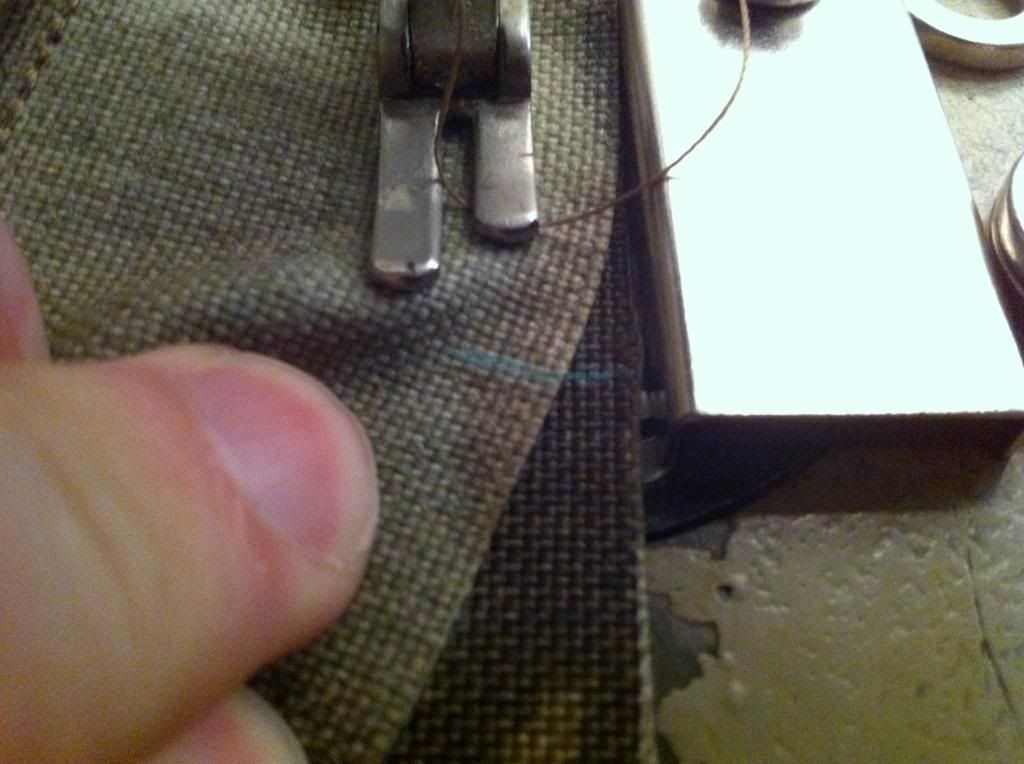
In the photo below the start of the curve is 2 stitches away from an imaginary straight line between the needle and my guide:

At this point you will begin turning the TOP material keeping the bottom (which is the spine) straight and against the guide. Turning it about the needle to bring the next 2-3 stitch lengths of material against the guide. The material behind the guide will lift as you sew around the corner, and obviously swing away from the guide, don’t worry about either.

Continue shifting the material INTO the guide and hand-wheel 2-3 stitches at a time. See the little wrinkle against the guide in front of the imaginary line I referred to before? Don’t worry about that either, as long as the material under the presser foot is not wrinkled. You are basically bunching more material into a smaller space than would be there if it remained flat, that extra material has to go somewhere…

Note in the image above, the pouch spine remains straight against the guide through this entire process…
After exiting the corner it will want to stand up behind the needle, don’t worry about it, it’s normal. Power stitch through the next straight away being careful that the spine and front/back remain alined against the guide.

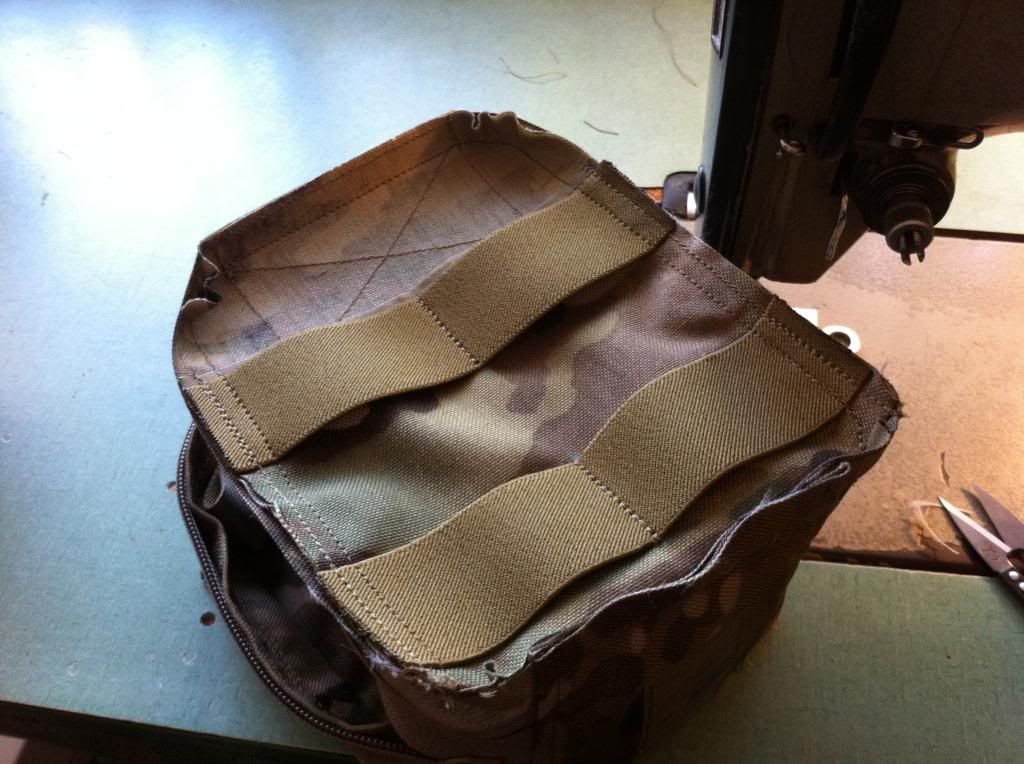
The results of this method yield very clean corners, very quickly:

There are only two difficulties in this method, the last corner and the other front or back panel. However the word "difficult" makes it seem a lot worse than it is…
The last corner is sewn in the same manner as the previous ones, only if sewing a smaller sized pouch as pictured you must muscle the spine against the guide. See the image below that the pouch is trying to pull the spine away.
The last corner is sewn in the same manner as the previous ones, only if sewing a smaller sized pouch as pictured you must muscle the spine against the guide. See the image below that the pouch is trying to pull the spine away.

Second, the other side.. Not really a big deal at all, you just have to keep in mind that there is a lot more material moving around, and keep it out of the way. However the example I’m using is a full-clamshell pouch, so I simply unzipped it, if the project is a top-opening pouch or similar attaching the second panel will be a bit more difficult. Approach it the same way as the last corner had been done previously, just muscle the spine and panel against the guide and sew-on to finish.

Inside-out result:
Right-side-out result:


Clean even corners all the way around, both sides.
Use this method on all your projects with curved corners where the pouch has a separate spine and front/back panels, or even only a spine and front panel as in an exterior pouch on a pack (where the pack makes up the back after it is attached). I guess you could use the basic idea on other types of pouches as well, like a "T-Pouch" where the whole pouch is a single piece, just think it out before you get started..


0 comentários:
Postar um comentário